Recorder Tricks and Tidbits #2
 We’re edging every closer to the end of the school year but we’re still plugging away with recorders! My students have really fallen in love with this quirky little instrument and I’m so proud of their progress. Today I stood back as my kids played “Mambo Mary B-A-G” from the book In the B-A-G by Janet Day and I was actually struck by how good they sounded. That’s a good feeling, right!?
I learn new things every day about how to teach this lovely instrument (and most of the time I really do think it’s lovely) and the more I learn the better I become at teaching. I thought of a few more things that I’ve learned/tried that I wanted to share to make your recorder unit/teaching spectacular. These ideas might not be ground-shaking but they might just save you a minute or two every day (and really, that’s a big deal)!
To see my previous “Recorder Tricks and Tidbits” blog post, click here!
1) Try Using A Tenor Recorder
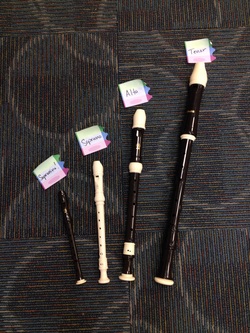 It is worth it to invest in a tenor recorder. Totally worth it! I love the tenor recorder for a couple of reasons. First of all, when you are standing in front of kids and demonstrating, the tenor gives them a much bigger picture to look at. When you spread out your fingers a little more for the spacing of the holes they’re better able to see and understand which fingering you’re using (it’s much easier for them than trying to see your fingers change on the Soprano recorder). The tenor is like a real instrument version of those enlarged “Recorder Dude” signs that you can put up on your wall.
I also love the tenor because it sounds an octave below all the soprano recorders. This means that when you play it will sound an octave lower than the students, making it stand out from their sounds. It takes some kids a little time to distinguish and listen for the tenor sound, but when they know what to listen for it really helps them out. I don’t feel bad asking kiddos to listen for this new sound because recorder playing is aimed at upper grades and students need to be able to hear that octave jump at some point.
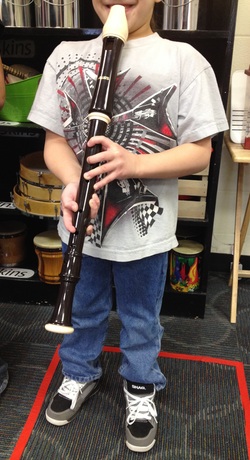 My added incentive for kiddos is that when they reach their “Black Belt” in recorder karate I’ll let them play the tenor. It’ll be great for small group work because the black belt kiddo can play along on tenor (same fingering as the soprano) while the other kids keep playing on sopranos!
Now, when I went about purchasing my tenor recorder I ask around with friends from my Orff levels and sent an email to Dr. Rob Amchin who taught the Level III at the same time as I was taking Level I. Dr. Rob says that the Aulos tenor and alto recorders give you a good sound and a value for their price (and they even come in “modified” versions so that little hands can better grip and play them. They’re still pretty big (as the picture to the right suggests…).
Here’s the link to the recorder that I got. $52 isn’t a bad price though you might be able to find the price lower somewhere (doubtful, West Music is the best!). I’ve played my recorder for a few months now and I totally love it. I would trust that this Aulos is a great instrument and I trust West Music to get it to you super quick and with few issues!
2) DIY Recorder Karate Reward Belts
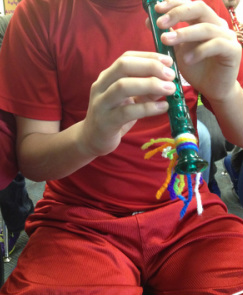
So, if you love Recorder Karate you’ve probably struggled with what to do when a kid earns a belt. Do you buy those expensive belts from the catalog in a million colors to tie to the bell of the recorder or do you make your own? And how do they attach? I know people who put a “ponytailer” (I’m told that’s the correct terminology for the thing girls use to keep their pony tail in place) or a rubber band-like hair tie on the end of the recorder and then tie earned belts to that. I just tie the belts directly onto the bell of the recorder, double-knot it, and call it good. How you tie is up to you. The rest of this little idea is WHAT you tie and how to make it yourself.
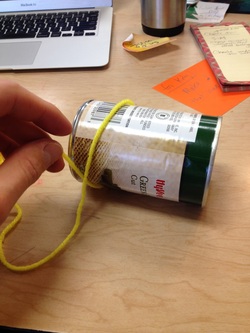
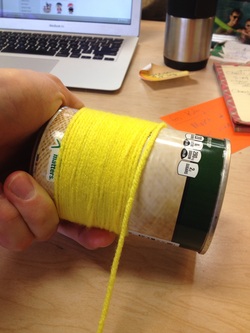
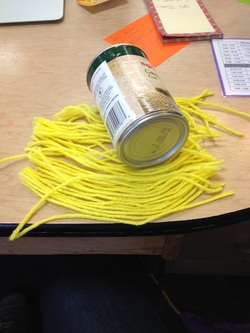
Don’t buy recorder karate belts from a catalog! They’re so expensive! I’ve found that tying my own belts (while it takes time and can be a pain) saves me lots of stress and money. I bought skeins of yarn two years ago when I started recorder karate and haven’t replaced them yet! Yes, it takes time to cut and tie and prepare them, but I just pop in a movie at home and watch while I tie. I’ve also taken the yarn to staff meetings and have had other teachers help me tie while they listen (and my admin doesn’t mind!). Here’s how I cut my own belts.
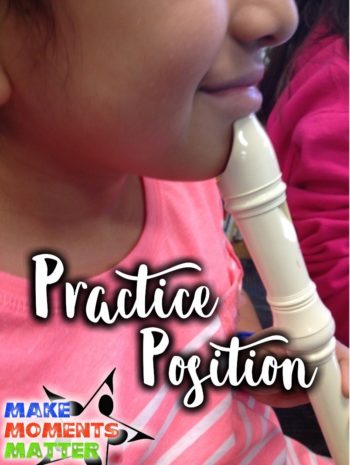
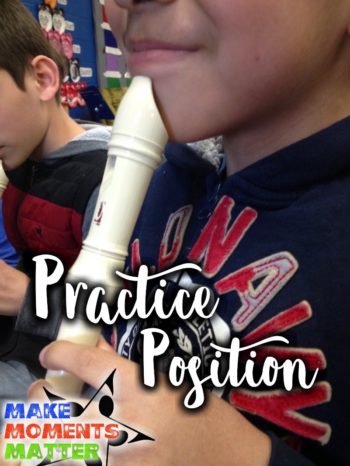
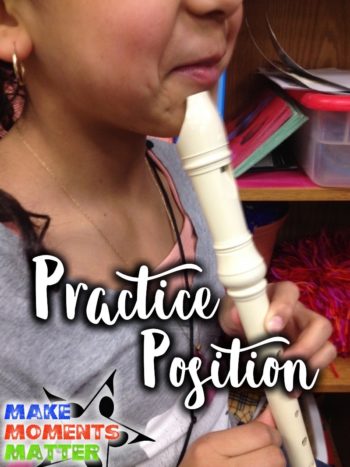
3) Practice Position
I think that I can credit this idea to Greg Gooden, my recorder teacher at my Orff Level training last summer! It’s been a lifesaver! I used to have students put their recorder on their knee as they did the fingering and read through a new piece. That worked alright, but it was a totally arbitrary spot to put the instrument and kids only remembered it some of the time. I would tell them “practice position” and they would sometimes remember what it looked like and where their recorder should be. More often than not, their recorder would migrate to their mouth or it would be really far from their body. I never really knew where to tell them to put it to help them with fingering practice.
Then I found “Practice Position” on your chin. I love this because it allows the student to practice the fingering with almost exactly the same sensation that they would have if they were playing with the instrument on their lips. The recorder sits in almost the same place, posture is similar, and their arms aren’t extended out at all. Once they learn the fingering this way, the recorder moves only a short centimeter up and they’ve got it. It makes the switch from practice to playing so easy.
What are your tricks and tidbits to share? Leave a comment below with your idea, question, or comment. If you have and great ideas or resources on your Pinterest boards, send them to me! I’d love to use some of YOUR ideas.



7 Comments