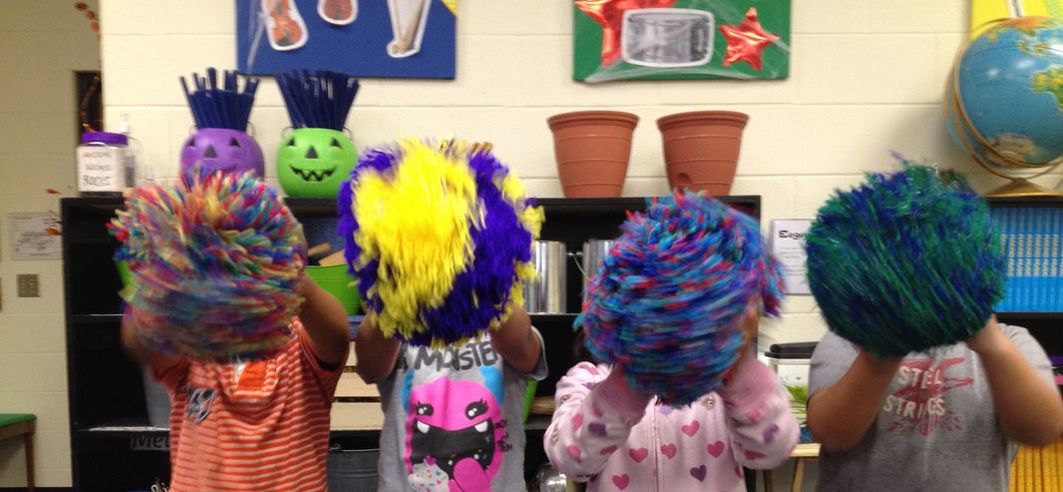
DIY Yarn Ball – The Perfect Classroom Tool
 I discovered the large Yarn Ball this summer when I took my Orff Level One coursework at Baker University. IT IS AMAZING! Thank you Dena Byers for using/showing me this tool and Jennifer Donovan for teaching me how to make it! It’s a fuzzy poof ball that can be used for nearly anything. The yarn ball is fun to grip and toss and squeeze. I’ve used it for the following things: reward (you get to hold the yarn ball if…), steady beat, passing from one to another, marking space (it’s the thing you walk to/turn around), tossing around the room, and so much more. I keep finding reasons to use the yarn ball… It’s the perfect manipulative or “toy” to keep around.
I like the yarn ball for a variety of reasons. I think that it’s better than a tennis ball, dodge ball, etc. because it’s soft and won’t be a problem if it hits a kid in the face or goes farther than you expected and lands on a xylophone or piano. It’s customizable because you can make it in any color, with patterns, multicolors, school colors, solids, fade outs, etc. You can make it bigger or smaller and you can make it with the softest yarn ever (which turns into a huge poof) or dollar store yarn. Seriously, the possibilities are endless!
Okay, enough about how I love this, and now to the process. Click the photos for a larger view. Please leave comments if any of the directions don’t make sense. I’ll try and streamline the process if my wording isn’t clear
Materials You’ll Need
- Cardboard circles (medium-sized pieces of cardboard that are thick with a good weight cut into a circle with a hole in the middle) see dimensions below
- Heavyweight scissors. I use kitchen shears.
- Two skeins of yarn (for larger/thicker yarn balls). See below for more on choosing yarn…
- Zip ties (or rope that will hold) I use 14” zip ties and it is enough and more for my yarn balls.
Step by step process – Click photos for larger view
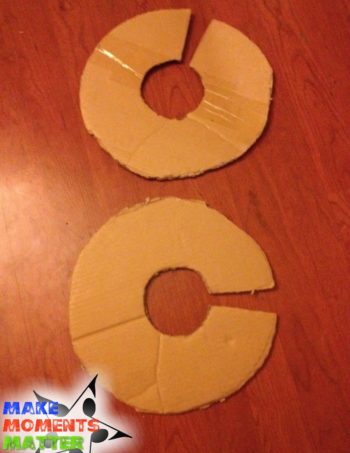
You need two cardboard circles to start. I make mine with a cut out so that they’re a “C” shape but some people make them as full circles. I’ll explain why this happens in a minute.
My cardboard circle dimensions
11” in diameter and
4″ for each of the sides
3.5” in diameter hole in the middle
So… 4″ left side, 3″ center hole, 4″ right side = 11′ all the way across from one side to the other. Hope that makes sense.
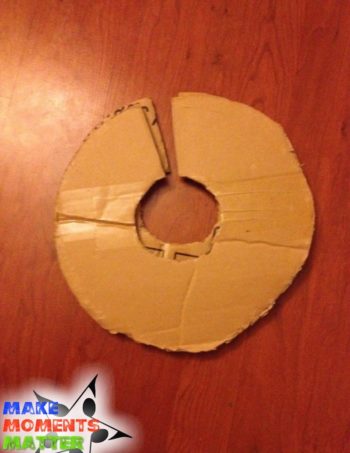 I line up the circles so that the hole of the “C” matches. That’s important if you’re going to use the “C” set up. I put a piece of odd colored yarn in the middle (a bright color that is NOT the color of your yarn ball so it’s easy to spot later on in the process).
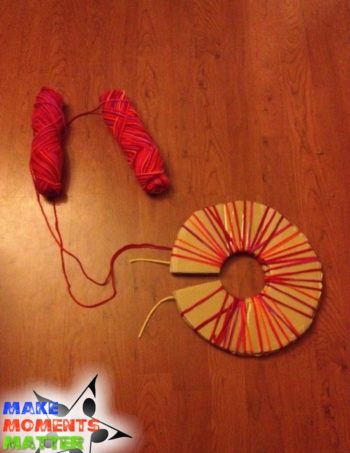 Then start wrapping. I take two skeins of yarn at once and wrap two strings at a time so that this goes faster. If you’re using two skeins of the same color this will work perfectly. If you have two colors and you don’t mind them mixing in the ball then again this technique is fine. If you have two colors and you want to make a pattern wrap one color for an inch or so around the C. Then wrap the other color for an inch or so. That’s how I got the yellow and purple yarn ball that you can see in the gallery.
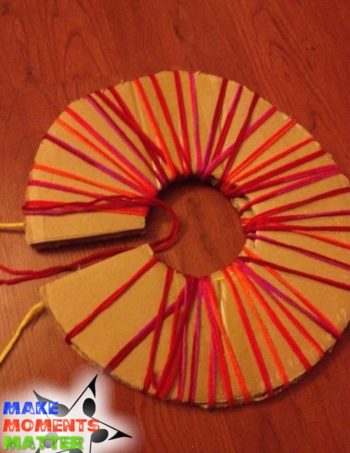 I make one quick swipe around the C so that I start to get an even layer (this also helps to hold the cardboard together. After that I wrap tightly from one side to the other and back again.
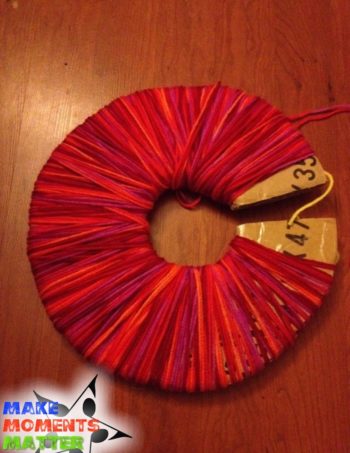 This is where the C shape is important. With the C you can go in and around quickly. Other people who use an “O” shape have to cut long long pieces of string and go in and through over and over again. I can’t imagine how long this would take. I feel like it would be forever. I stick with the C shape.
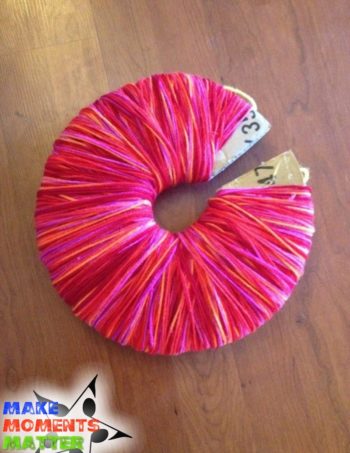 Keep wrapping until you get a very thick layer. The more yarn you wrap the thicker your yarn ball will be in the end. I wrap all the way until I’m out of yarn to wrap. Two full skeins is usually enough for me.
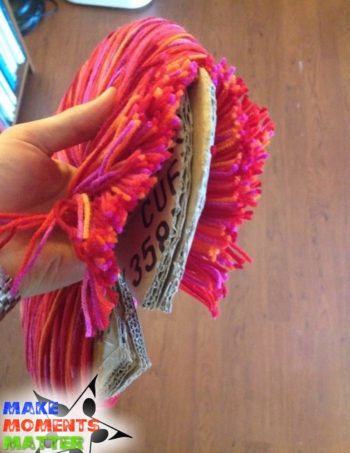 Then carefully start to cut around the edge of the C. I have to use kitchen shears for this instead of normal scissors. It’s especially hard if you’ve wrapped the yarn really tight.
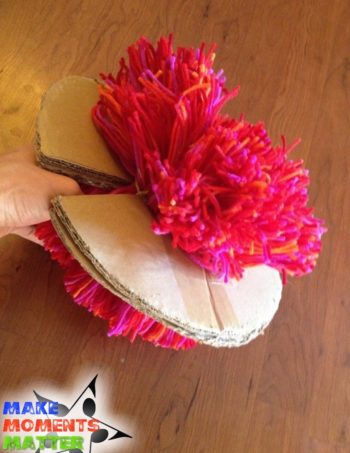 Once you’ve cut it all out it’ll look something like this. Be careful! You’ve got about 4 million little pieces of loose yarn right now and if you don’t tie it off you’ll loose it all in a big mess.
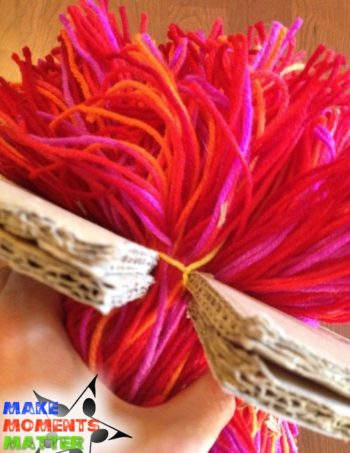 Find that odd colored piece of yarn now and tie it tight so that the many yarn pieces stays together as you complete the next action. This brings them all together and gives you a little allowance to move the cardboard while you work on the next step.
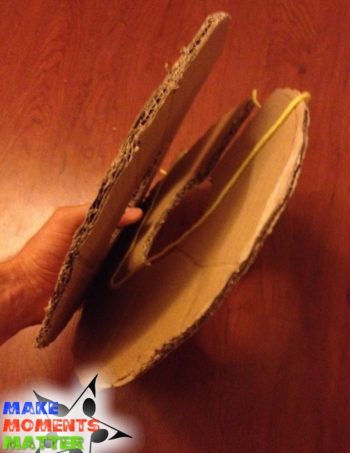
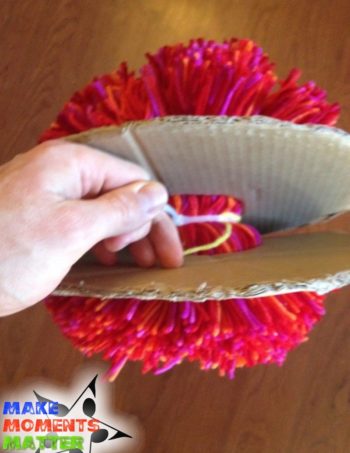 Get your zip ties. And tie them down as tight as you can. You’ll need to move apart the cardboard a bit as the zip ties go between both pieces of cardboard. Essentially you’re belting down your pieces of yarn together. You must do this very tightly or else you’ll lose all your pieces of yarn and you’ll have a huge mess.
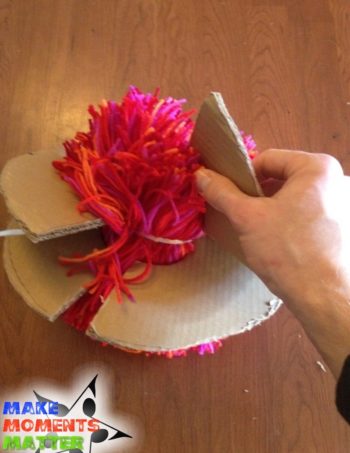 Once they’re really tight you can take your cardboard off. I don’t rip my cardboard circles apart because I’ll use the cardboard again, but what you do with the cardboard circles is up to you.
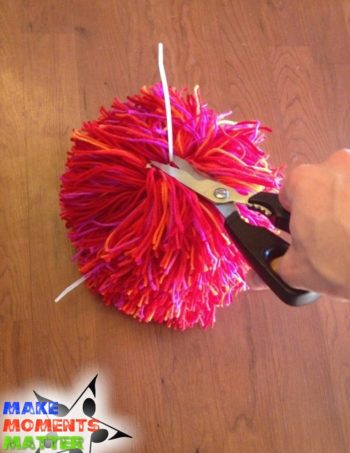 Then you need to clip away the excess ends of the zip ties. Snip close to the connection of the tie so you don’t have much exposed (and I file down the cut off tie with a nail file so that you don’t have a sharp edge hidden in the middle of your yarn.
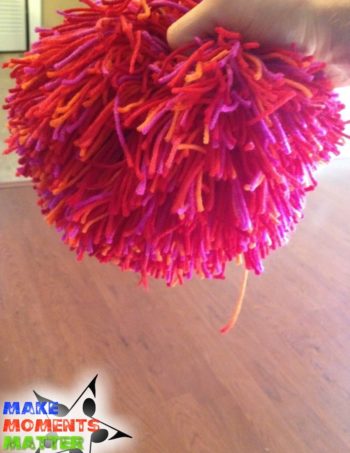 Then hold your yarn ball up and give him a trim. You might have some long pieces sticking out, that’s okay. You can cut them down or pull them out. Just so long as you don’t pull a LOT of pieces out you’ll be fine. You can lose some of the strings but not all. It’s really just a ball of a million tiny pieces of yarn that are held together with ties. You can afford to lose some of those, so don’t freak if a kid pulls one out.
I hope this process has made sense. As I said above, you can click each picture to get a closer view of every step and if you have questions about the process PLEASE leave comments below or email me and I’ll try and explain in more detail. My email is MakeMomentsMatter@gmail.com



Pingback: 7 Ways to Use A DIY Yarn Ball In Your Morning Meeting - Welcome