DIY Orff Instrument Stands
 Through the blessings of so many people, I have been able to really build up the number of barred percussion “Orff” instruments in my classroom. When I came to this school we had two soprano metallophones and a bass xylophone and now there are nearly 14 instruments of all different types and sizes to use in our little instrumentarium. New instruments have been made possible through generous donations of folks from around the country through the DonorsChoose.org website (if you’d like to learn more about getting started with DonorsChoose.org check out this blog post). Now that I have these wonderful instruments I want to put them on Orff instrument stands so that students can access and use them easily.
I’ve always thought about and pined after (and was sure that I would never have) Orff instrument stands. These stands are usually made of metal and work as a type of scaffolding for your instrument, holding it up to the right height to be played. Stands also often come with wheels so that you can move the instrument around the room quickly and easily, making class set-up a breeze. The real beauty of stands for your Orff instruments is that students can walk up to and stand up at the instrument instead of sitting/kneeling to play. This makes transitions so much easier and corrects some of the posture and playing problems that you encounter when kids are sitting and playing. I would imagine that it would also make it easier for kids to share (two students to an instrument) if they were standing.
The only problem is that Orff instrument stands are expensive, usually $100+ each. You have to get the right kind of stand and right size for your instrument for it to fit correctly and work easily. While donors love to give money to pay for something like a xylophone, they aren’t as easily swayed by the idea of donating to pay for a stand. Stands just aren’t as exciting as instruments and projects for resources like stands don’t get funded as often. In my district we don’t have a lot of money to use on classroom resources and we definitely don’t have the money to pay for Orff instrument stands.
DIY Orff Instrument Stands
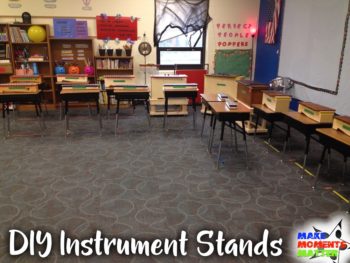
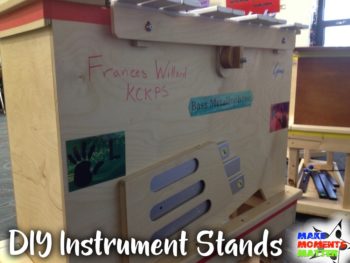
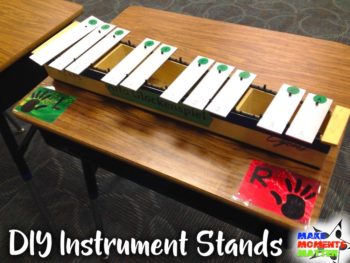
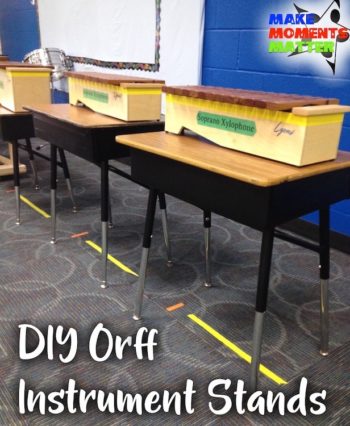 Well, the music teacher gods must be smiling down on me because I recently was able to inherit some old student desks that were going to be tossed out. Apparently the district had an overabundance of student desks (something about replacing old styles) and these extras were going to be tossed. I quickly snatched them up and brought them to the music room to see what I could do with them. Lo and behold, when they’re adjusted they make perfect little stands for my Orff instruments. One of the desks was even altered and adjusted and now provides a way for my student in a wheelchair to fit right in and under the instrument!
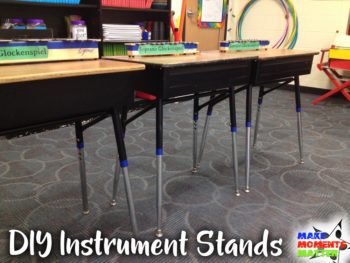
The biggest alteration I made to the desks was to change the height of the desk surface. It’s pretty easy to adjust the length of the desk legs with a Phillips head screwdriver. I adjusted each desk so that all the keyboards/instrument bars were at the same height. That way when a kid walks up the the instrument they’ll be level with the instrument next to it no matter whether they walk up to a glockenspiel, xylophone, or metallophone.
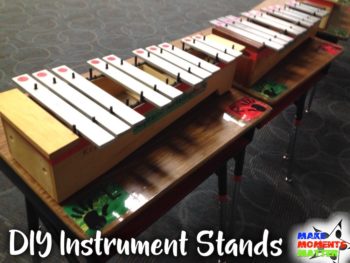
The individual student desks are essentially the same dimensions as the width of my instruments so they make perfect Orff instrument stands. They keep the instrument at the right height and make it easy for kiddos to pick up mallets and play. The downside is that the DIY Orff instrument stands don’t roll easily like the stands from the catalog might. That said, they’re not difficult to move and they’re FREE, so I’m pretty happy with them overall.
Extra Additions: Inside the Desk, Color Coding, and Right Left Reminders
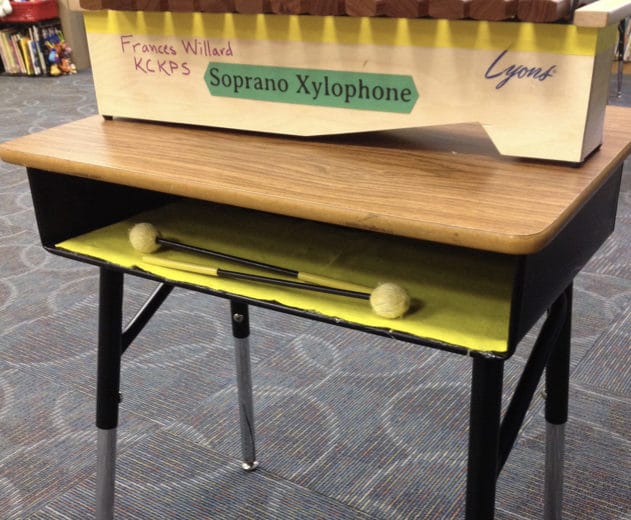
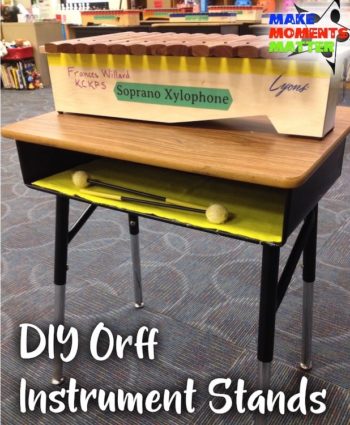 Inside the Desk: One addition I made to the desks to customize them even further was what I added to the inside of the desk. These are really just old student desks so they have a compartment where students might normally put their notebooks, pencils, paper, and other odds and ends. I took colorful felt rectangles (get them at Hobby Lobby for 25 cents a piece) and hot glued them to the inside of the desk to use as a lining. Now when students leave the instruments they can put their mallets inside the desk where they would normally put pencils. The felt also provides a soft place to put the extra bars that we take off for different songs or to store their accidental bars. It’s been great so far!
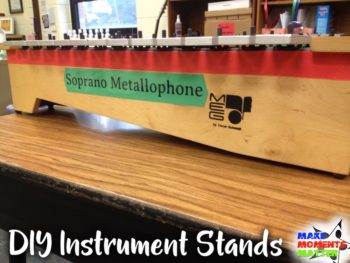
Color Coding: In an effort to continue the color-coding of my room I came up with an idea to add a little more color to my instrument stands. A few years ago I started marking each type of instrument with a different color. I took a strip of colorful masking tape and affixed it to the different instruments: xylophones are colored with yellow, metallophones with red, and the glockenspiels with blue. Instruments already have tape marking which is which but this week I added the masking tape to the desks themselves, adding a ring of color on the leg of each desk.
My hope with the color coding is that students will see the color and then start to see how the instruments are grouped together, quickly move to the correct instrument, and look for connections between instruments. The colors also help me to remember which instrument is which and allows me to incorporate classroom management tricks like “If you’re standing at a red instrument, you can line up.” for the little ones.
The color coding has really beneficial for my students. I’ve found that it’s easier for my Kinder and first graders to hear a color than to try and read/remember/understand the labels of the different instruments. Ever hear a Kindergarten English Language Learner try and pronounce glockenspiel? It’s WAY easier for those little people to just remember the color. Also, for the little ones I can say things like “Did you notice all the instruments with yellow on them? What are their bars made out of? Wood! How is that different from the instruments with the red on them?”
Right and Left: I also took the time to add small “Right” and “Left” posters that I recently made to each of the desks (you can find them here for FREE). To make the small versions I took the PDF that I created and when I went to print I clicked on the option that says “Print 6 on each page.” I laminated, cut out, and taped those small reminders down to the desk and so far I’ve had a really great response from kids. They see the connection with the posters that I hang above my whiteboard and they also understand the R & L for Right and Left. My hope is that these little reminders on the desks help them to remember as we play patterns, explore the instruments, and us the instruments day to day.
Eventually I’d love to replace all these student desks/makeshift Orff instrument stands with the real deal but for now I’m happy with this little DIY hack. As I said, the desks were free and easy to change/manipulate to make them work for my classroom. I’m also blessed that I have the space to keep all of my Orff instruments out all year long so putting them on up on desks like this doesn’t mess with my set-up.
What do you do for Orff instrument stands? I’ve seen lots of really great ides on Pinterest and would love to see how other folks make something like these stands for their classroom! If you also use student desks or of this blog post inspired you to try I’d love to hear about how it works out for you! Feel free to share your comment below.


5 Comments