Music Room Makeover! Room Tour 2016
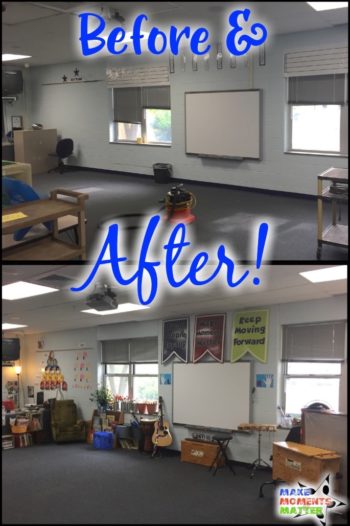
It’s a new school year in a new school with a new set of challenges and possibilities! As of August 2016 I am the new music teacher at Ralya Elementary School in Haslett, MI where I’ll be replacing a teacher who has been in the building for many years. I wanted to take some time to really make the room mine and transform the space so that when students walk in they’ll know that something has changed. Music classroom decoration is important to think about as you make a plan for your year. My goal is always a fun and inviting space with just enough on the walls to guide learning but not so much that students are distracted or overwhelmed.
I don’t think my classroom decoration/organization will ever truly be “finished” as there’s always something to add, alter, improve, eliminate, decorate, or change out. That said, I am really excited about some of the big progress that’s happened in my room so far and I wanted to share with you! I’ll add in some explanations with the “before and after” pictures so you can try and understand my thought process of what I put up and why. Along the way just click any picture that you want to enlarge. Check out this blog post if you’d like to see how I’ve decorated my classroom in the past and compare/contrast to this new room.
Front of the Room
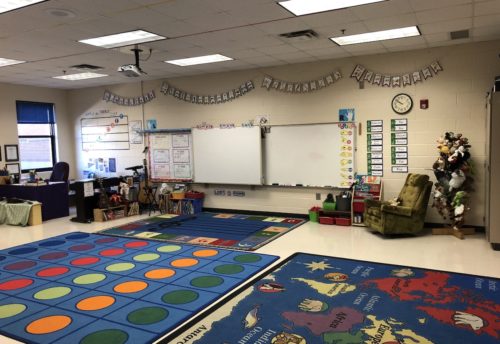
This odd room shape/configuration means students don’t all walk in and face one direction. They are more likely to move around, spread out and work around the room in small groups, and will feel comfortable no matter where they are in the room. This also means that I can reorient the room, move instruments, and rearrange things differently and they never go “whoa, what happened?” So, to say one wall is the front wall is sort of silly, they could all be the “front” of the classroom just like they could all be the “back” or “side” of the classroom.
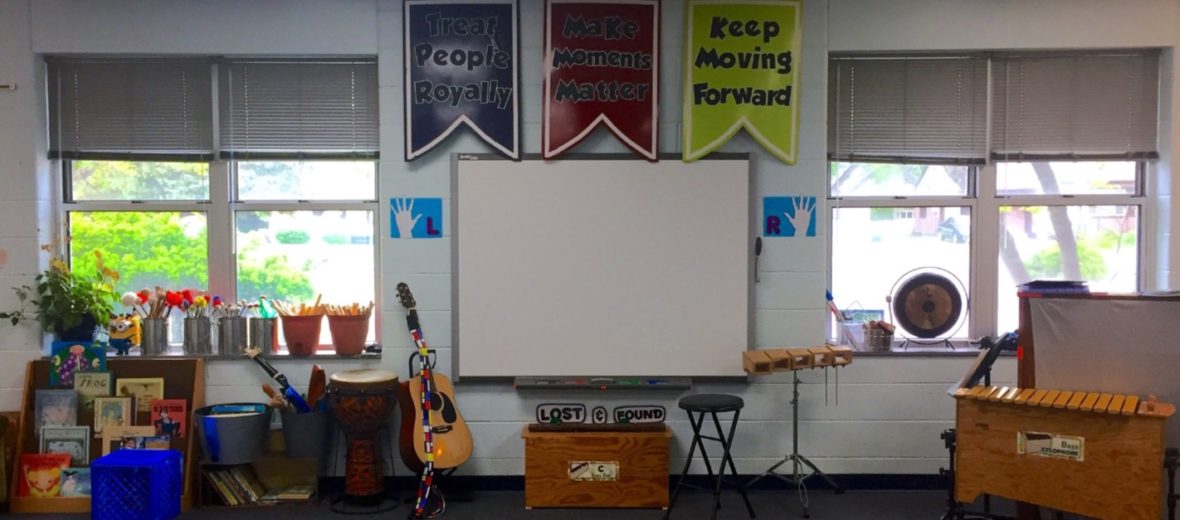
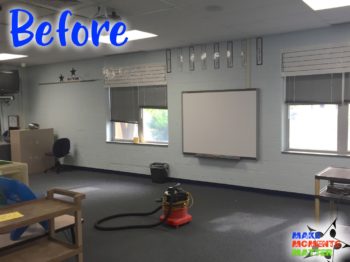
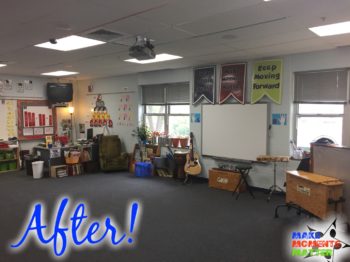
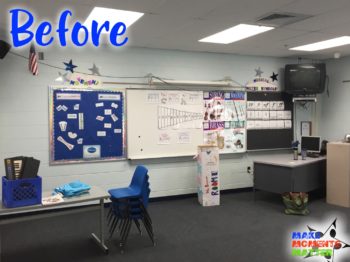
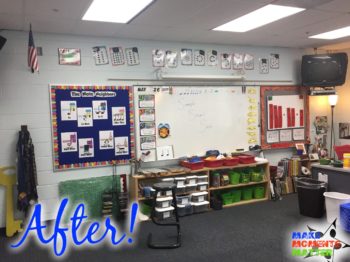
When you walk in to the music room the wall directly in front of you (which I’ll call the “front wall”) has two large windows which allow in some really wonderful light during the day. That wall also has a SMART board and just a little bit of wall space where you could put some posters or something. I decided to use the small amount of free space on this wall to put up my classroom rules banners and my right and left hand reminder posters. There’s not room for much else, so I tried to keep it simple.
If you read my blog post about “What Every Music Teacher MUST Have On Their Walls” you’ll see that I really like to have functional space down low that kids can use. I try not to get skyscraper-sized bookshelves or place anything important out of the reach of a child. That’s why I have several cans with mallets, a variety of classroom instruments, and books low enough so that kids can get to them easily. I try and keep those things low to the ground so that students can easily get to any instrument/resource that we might need and also put them away when we’re done.
Right Side of the Room
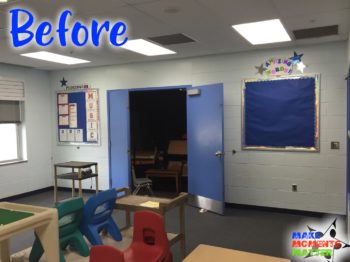
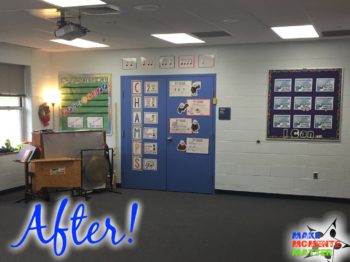
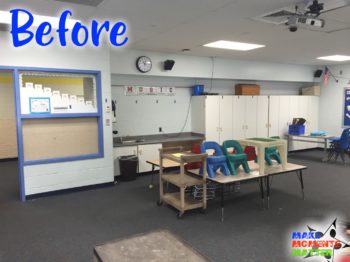
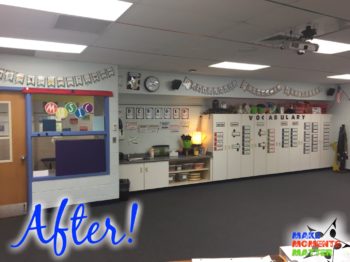
Moving on to the wall immediately on the right when you walk into the music room. Again, this room has an odd shape and proportion and the right wall length is sort of awkward. It has two huge blue doors right smack-dab in the middle that break up the length of the wall but open onto the amazing storage room/closet. The doors cut up the space and are pretty imposing, meaning I can’t easily put a bulletin board/decoration on that wall. Instead I chose to use the small bulletin board spaces to display some basic information/anchor chart material including notes of the treble clef staff, CHAMPS/behavior expectation posters, anchor charts for frequently used vocabulary, and our “I Can” posters. I’ll break down explanations for each in the following paragraphs.
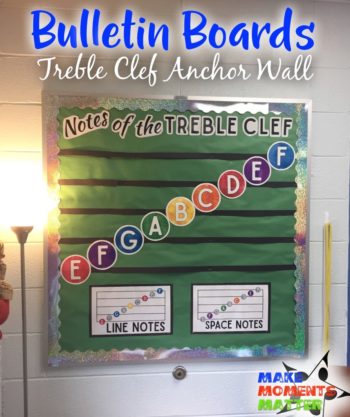 Treble Clef – Every year I teach the notes of the treble clef to upper grades. I wanted something up on the walls that students could easily look at for reference but that wouldn’t take up too much space. I hopped on my computer and whipped up something that I thought was visually appealing and colorful. The notes are made of colorful circles with the letter name printed inside and the staff lines behind them are just black construction paper cut to make nice horizontal lines. Easy peasey!
CHAMPS for Behavior Management- I won’t go too far into this board since I wrote an entire blog post about the CHAMPS behavior management system, but I’ll just write that this system was a huge help for behavior in my room. The CHAMPS system makes it totally clear for students the expectations of the classroom for any activity or behavior. What’s most interesting about this particular board itself is that each poster was printed, laminated, and then magnetized so it would stick to my big blue closet doors (making them functional)!
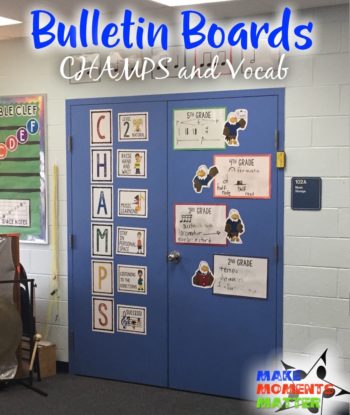 Here’s my quick and easy way to magnetize posters: Every year I go to local banks, credit unions, and businesses and ask them for their old calendar magnets. Often business will print out a flat magnet with the year’s calendar and their name on it to hand out as a free promotional item. At the end of the year, they often have leftover magnets that won’t make any sense for them to keep (they won’t hand out free 2018 magnets for the 2019 calendar year). I go to businesses and ask for their outdated magnets and use them for projects like this. Learn more about this process and how I made this space work when you watch this video.
Vocabulary Station- I wanted to make sure I had a special place to display important vocabulary that we were discussing in class. At this building I only teach grades 2-5 (I have Kindergarten and 1st grade in another building) and I wanted each grade to have their own special space. I put some big, white, printer paper on colored construction paper and then laminated it. Once it was laminated and cut out I put magnets on the back so that it would stick up on the big blue doors. Laminated paper like this is easy to write on with a dry erase marker and wipes clean. Now whenever I have new vocabulary for a specific grade level I’ll write it in these boxes so that kids can quickly reference which words are important for them. What’s really nice is that since the posters are just held up with magnets I can take them off the door, write on a level surface, and then put them back up.
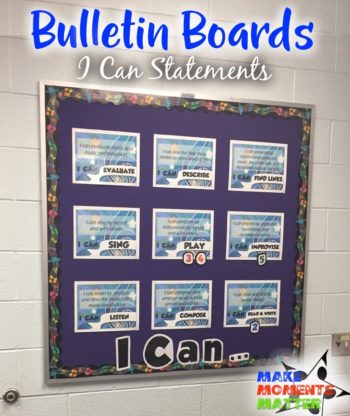 I Can Statements- Every school I’ve ever worked at has required me to post “I can” statements in my classroom. The I Can Posters are intended to help each student understand the point of every lesson and know what skills they should be able to do at the completion of that lesson/unit. I write a blog post about many different ways to display I Can Statements in your classroom and how to use them effectively if you want to learn more. The statements I posted here follow the older National Music Standards and the numbers move around to match the standard we’re working on. The movable numbers for K-5 are color coded to match the Silver-Burdett “Making Music” book series. You can get the I Can Bulletin Board set for FREE at this link.
Left Side of the Room
The left side of the room needed to be cleaned up and spruced up. I took those hanging cords and ran them up and through the ceiling so that they wouldn’t be drooping down and in the way. The left mini-bulletin board space easily transformed into an anchor chart for the Note Neighborhood and I covered over the blackboard on the right mini-bulletin board space with some fabric so that I could put up a big xylophone visual. I added some floating solfege hand signs on the white board, included a rubric on the left, and then used the space above the white board to put some really wonderful folk dance formation posters that I snagged from my friend Jena Hudson’s TPT store.
Note Neighborhood – The Note Neighborhood is just a set of stories that I came up with to help students remember note values and how notes and rests interact with one another. In my first few years of teaching I realized that students remembered things a lot better if there was some sort of story or narrative behind them. Instead of just saying “A half note gets two beats” I can tell students the story about the “Sassy Half Note” and how she interacts with the other “Note Neighbors” in her little town. The stories stick and are fun for kids to remember. I made a whole set of PowerPoint presentations that I use with kids whenever I introduce the notes but I also printed out this set of posters to use as a sort of anchor chart. Click here if you’d like to learn more about the Note Neighborhood.
Xylophone Visual – We use the pitched percussion instruments so often in my classroom that I wanted to have a space dedicated to percussion instruments with bars. With a big visual like this one I can take off or put on bars to show students what their instrument should look like when it’s set up properly. Using a big visual like this cuts down on confusion with kids and also allows me a place to demonstrate bar setup and how to play certain patterns. Click this link if you’d like to see how I made my own big xylophone visual.
Back of the Room
In the back of the room I wanted a functional space to grab any materials we needed and I wanted to warm up the space. I hung instrument family flags along the top of the wall, added a set of word wall cards on the cabinets, and filled in the little alcove above the sink with recorder anchor charts. Then I tried to fill every little nook and cranny with puppets, baskets, warm lighting, and other elements that would make the room feel more like home and less like a classroom. I wrote a whole blog post about adding ambiance to a classroom, if you’d like to hear more about why and how I decorate my classroom.
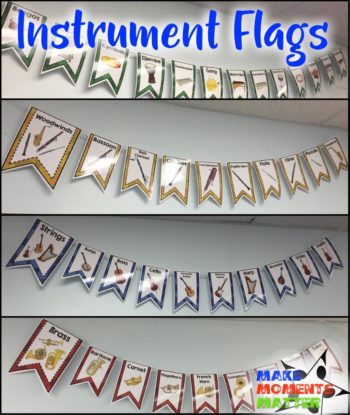 Instrument Flags – Instrument flags like these have been a staple of my classroom for the last few years. I always struggled with how to display different instruments of the orchestra in an authentic and exciting way without taking up too much space. Some posters out there are just too big or too small and/or don’t have the instruments labeled in an effective way.
The nice thing about using these flags is that you can string them up on some yarn or rope and hang them up near the ceiling of your classroom (often an unused space). They’re fun and colorful and look like a decoration but also serve an important purpose for instruction. More than once I’ve seen kids looking up at the flags and remarking to their friends about their favorite instrument, talking about “what I’m going to play when I get to middle school.” You can print the flags in black and white and they come in several different sizes making this a resource that I hope you can use in multiple ways. Check out the instrument flags at this link.
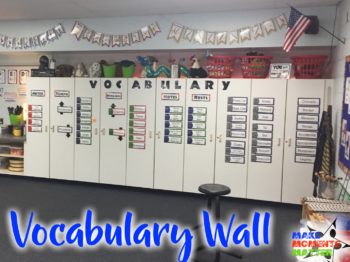 Word Wall – I don’t really think that there’s a right or wrong way to set up a word wall because we all use them in different ways. I choose to separate words by their categories when I post them up on the wall so that all dynamic words are together, all tempo words are together, etc. Many teachers just put all the words they’ll ever use up on the wall in alphabetical order, but I think that categorizing helps students see connections between words and find the correct vocabulary word a little quicker.
Putting the vocabulary words on the cabinets really helped to delineate what those categories were since each door held one specific element. What was really cool was how the quarter note on one door lined up with the quarter rest on the very next door. They were horizontally lined up which helped to connect them but they were on different doors which helped kids see a difference. I also used the term “vocabulary wall” and not “word wall.” This was just a personal preference and my admin. didn’t mind, so I went for it. You can get the word wall pictured here as a standalone kit, but they are also included in any of my room decor sets.
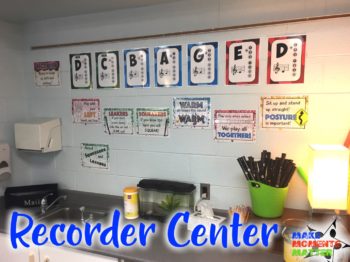 Recorder Anchor Charts – We play recorder quite a lot in my classroom so I wanted to make sure I had a space for some recorder reminder posters, fingering charts, and other information. I tried to put all my “recorder stuff” in one spot in my classroom. This space is where kids go to pick up their recorders at the beginning of class, where they return them, where I wash any borrowed recorders, etc. I like that this is sort of the “recorder hub” where all recorder things happen. You can see some of the recorder posters and resources I use at this link.
Front Door – Hallway
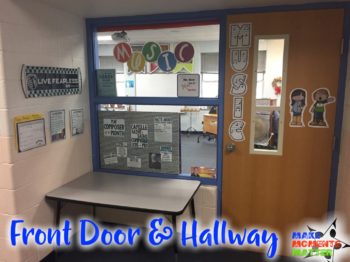
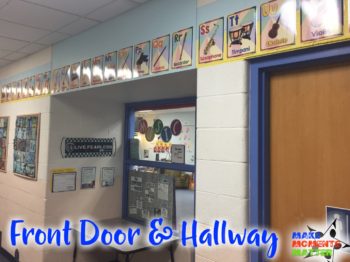
I love using my hallway space to get kids excited about music and to advocate for music education with my school community. There’s a little alcove right outside my front door which I loaded up with a Composer of the Month bulletin board (I love the sets from Sara Bibee!), posters about what I’m reading and listening to, a musician/composer birthday calendar, and more. Above the music room door I put up my instrument alphabet posters. I was so bummed when the set wouldn’t really fit anywhere inside my classroom but was super excited when I realized I could put them out in the hallway for kids to see every single day. It turned out that I got just as many staff members and parents stopping to look at the alphabet as I did students. Total win!
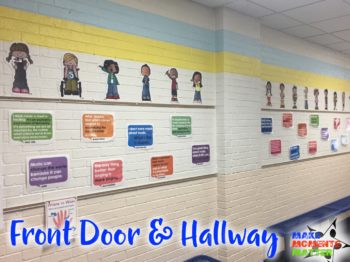
Across from the music room I use the space in between the tack strips to put up posters with inspiration quotes, fun music facts, and more. The set that you see in the picture is supposed to look like speech bubbles or maybe text/iMessage bubbles. Kids love to go through and read the various quotes about what makes music important and are delighted when they see quotes from Dumbledore and Taylor Swift. These posters also catch the eye of my administrators and parents who are in the building and they serve as a fun and easy music advocacy bulletin board. I’ll often rotate posters through this space and have quite a few options to choose from.
Well, I hope you enjoyed this little tour of my new classroom. I definitely have more to do and places where I can improve. I love thinking about how I can alter the space and make it more functional for students while also making it a better place to learn. If you have ideas for me or if something you saw in this post sparked your interest, please leave a comment below! I’d love to hear from you and appreciate your comments!


Leave a Reply