Bars On, Bars Off – Learning How to Set the Instruments Correctly
 I love using my barred percussion/Orff instruments and I love when students feel proficient playing accompaniments, tapping out melodic patterns, and especially improvising! What I love ALMOST as much is when students feel good about the procedures of how to hold mallets, how to stand at the instruments, how to take off and put on bars, and where to put everything. I love when they’ve got those procedures down BECAUSE it makes everything else so seamless and lets them feel accomplished and take ownership of the instruments and the experience.
One thing that always bugged me last year was how hard it was for some learners (especially the younger ones) to put bars back on the instruments at the end of class. Any time we play songs in a pentatonic scale we take off bars that we don’t need. This just makes it easier for kids because they don’t hit the “wrong” notes and makes improvising a super easy task. However, I inevitably ran into the same problem in every class. I wanted to take our music making up to the very last second possible and in doing that I didn’t leave students enough time to replace bars on the instruments. I would always assume that putting the bars back on the instruments would be a simple task, but that assumption would frequently make us late and would frustrate me to no end. So, this year I’ve decided to do two things to make this process easier and hopefully set us up for success later on.
#1 – Take the Time to Teach Procedure
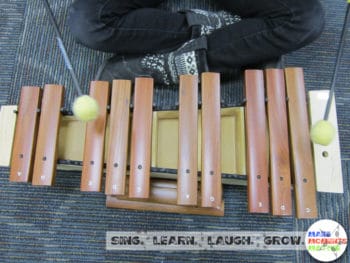 The first thing is that I need to do is be super intentional and take the time in the first few weeks to really show students how to take off and put on bars. Just like when teaching kids line procedure, rules for movement, emergency/evacuation/shelter/lockdown procedure, it will take time and will be a mental drain for me to do this with EVERY class for several days in a row (repeating the same directions over and over and over) but I think that it will have a huge payoff. If I’m very clear and give them plenty of time to practice the act it will give them a much better chance for success later on in the year.
This also gives me a chance to encourage critical thinking skills as we learn where the bars go and why. I’ll take some good time at the beginning of the class to talk about pentatonic scales (at least with upper grades) and try and tie that learning to their math and science learning. We’ll talk about the root “penta” and how that ties into their previous learning and then we’ll discover the different pentatonic scales we can have. For instance, we’ll talk and then set C pentatonic (removing F and B) and then we’ll talk about F pentatonic and reset the instrument in F pentatonic (replacing F and removing E) and so on and so on. This would give all kids the practice of taking the bars off and figuring out where to put them (at my school we put the bars into the desk that holds up the instrument – Read this blog post about my instrument set up and what I use for Orff stands!). It would also be smart at this point to rotate through the instruments so that students get a chance to take off and put on bars at multiple instruments since doing this on a bass xylophone is much different than doing it on a soprano glockenspiel. Here too is another chance for critical thinking as they have to transfer the skill they learned on one instrument and perform it on a different instrument.
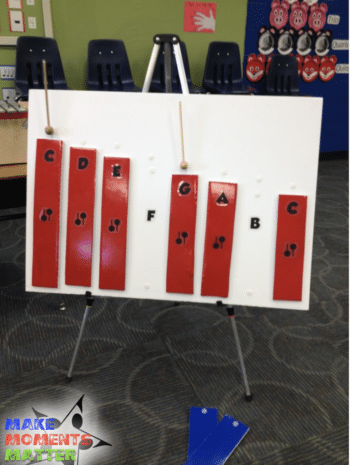 Taking this time gives students a chance to put bars back on the instrument and make that act its own task (instead of it being something that’s tied to the end of a lesson on singing/playing). There always seems to be one kid in the class that doesn’t understand how to put bars back on in the right order and needs help. The most frustrating is when they’ve got two C bars in their hand (one long for the low C and one smaller for the high C) and they put them back in the wrong places. You’d think that one huge bar in the middle of other smaller bars wouldn’t make sense but for some reason kids just see that it’s a C that comes between a B and D and they put it down. In these moments I try and calm my inner “why don’t you get this!” voice and instead take the time to pose some critical thinking questions. Sometimes I even do a think aloud with them using my homemade xylophone visual and work through this process with them as I hold the longer and shorter bars in my hand. “Wow! You’re right, the C does go after the B and before the D but does this look a little odd to you? Is this C the same size as the bars around it? Is there a better place to put that bar that would also be between a B and D (or in this case at least before a D). We take the time and work through it together and students leave feeling successful.
#2 Super Sticker! Labeling My Orff Instruments
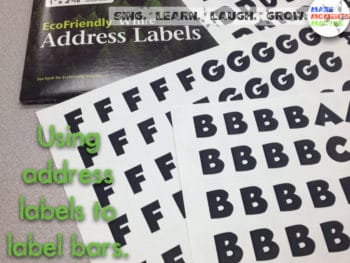 One more thing I’ve done this year to help my students be successful is label my instruments a little more thoroughly. I have Lyons brand instruments and in case your’e not familiar, Lyons brand is a low-end brand when it comes to barred percussion instruments with Sonor or Studio 49 being the “brand to buy” because of their durability and high-quality sound. I wish that my district had the money to buy me all Sonor brand or Studio 49 instruments but they don’t. Almost all the instruments in my room are Lyons brand because I got them through DonorsChoose.org donations and asking for the Sonor would feel impossible. When using DonorsChoose I can almost get two Lyons instruments for the price of one Sonor instrument. Honestly, I’m pretty happy with the Lyons brand. So far, they’re holding up pretty well, the sound quality is not too bad, and the kids can use them without difficulty. But ask me again in a few years and we can see if they are still holding together and sound alright.
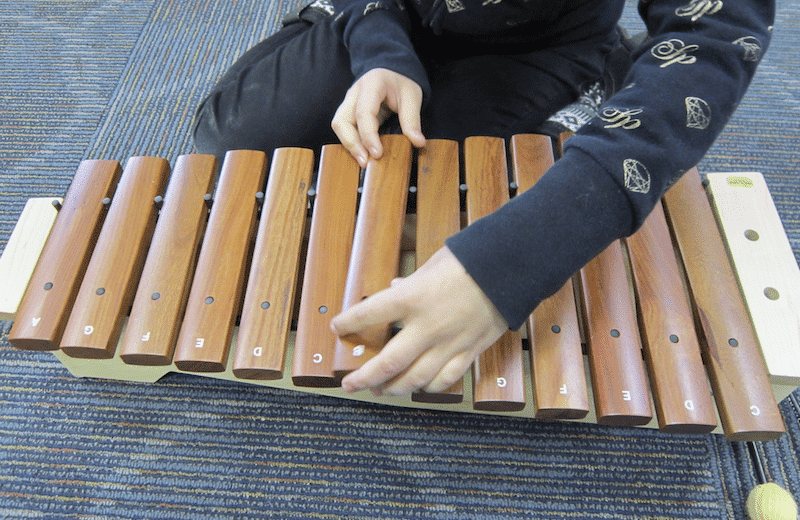
One thing I LOVE about Sonor instruments that Lyons doesn’t do is label the INSIDE of the instruments. That way, when kids pull a bar off there’s a letter etched inside the inner lip of the instrument to show kids what they’ve pulled off and help them when it’s time to replace the bar. I love that visual and think that it helps so much when kids are trying to figure out where their bars go. So, I decided to make that visual possible for ALL of my instruments.
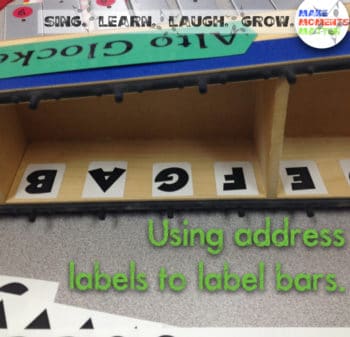 To do this, I went back to my trusty address labels. It took some time to figure out the formatting but I was eventually able to print out letters that were big enough to see, easy to print, and easy to cut and stick. I printed the labels, cut them right down the middle of the label with my paper cutter and then added them to my instruments. I made some bigger letters for the bigger instruments and also came up with some smaller font size labels for my little glockenspiels (since the full label wouldn’t work in there). With the xylophone and metallophone labels I just cut them in half and they worked fine. The small print/glockenspiel labels had to be cut down a little more so that they fit inside the instrument but since I only have a few of those I didn’t mind.
I’m going to post the labels that I used in a PDF form (so that that font works well for you) in my TpT store. Look at the end of this post for a link. If you’d like to print and us these yourself I’d suggest that you use a label that’s compatible with the 1 x 2 5/8″ labels. Pretty sure it’s the Avery 8160 label (here’s the link to the product on Staples… though I’m sure you could get them almost anywhere) that you would need to make these work. The sheets have quite a few letters on them, enough for two of every letter (except for B’s because there’s usually only one B per instrument).
 I’m really hoping that these labels and spending time on the procedure help out my students this year and make playing and resetting the barred instruments a little easier. As I mentioned above, I’m offering the PDF that I used to print my labels for FREE if you follow this link to my Teachers Pay Teachers page. Let me know what you think and leave some feedback if you download so that I know how I can make changes and make things better!

10 Comments