Music Room Makeover! Room Tour 2019
I love thinking about classroom design and function. When I plan out my classroom (the bulletin boards, the general layout, where and how to store the instruments, decorative details) I always try to keep kids in mind. I want to think about how the room functions for them and how it can work for multiple grade levels.
And every time I walk into a friend’s classroom I stop to take it all in, thinking about the purpose of the room and how it would function day-to-day. I get so many great ideas from seeing other classrooms and that’s why I wanted to share my classroom with all of you. If this gives you ideas of what you want to do in your space, great! If you don’t like any of it, that’s okay too. I just wanted to share what’s worked for me in my classroom in the hopes that it will give you some inspiration or encouragement for your own space.
I didn’t make this post because I’d finally figured out the optimal design and that all others should make their room look just like mine. Quite the opposite. I don’t think my classroom decoration/organization will ever truly be “finished” as there’s always something to add, alter, improve, eliminate, decorate, or change out.
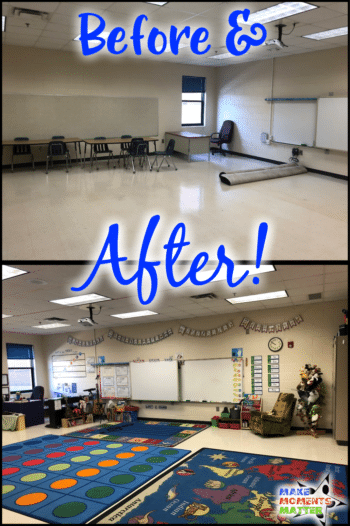
That said, I am really excited about some of the big progress that’s happened in my room at Woodstock Elementary School (WES) so far and I wanted to share with you! I’ll add in some explanations with the “before and after” pictures so you can try and understand my thought process of what I put up and why. Along the way just click any picture that you want to enlarge. Check out this blog post from 2015 or this blog post from 2016 if you’d like to see how I’ve decorated my previous classrooms and compare/contrast to this new room.
Front of the Room
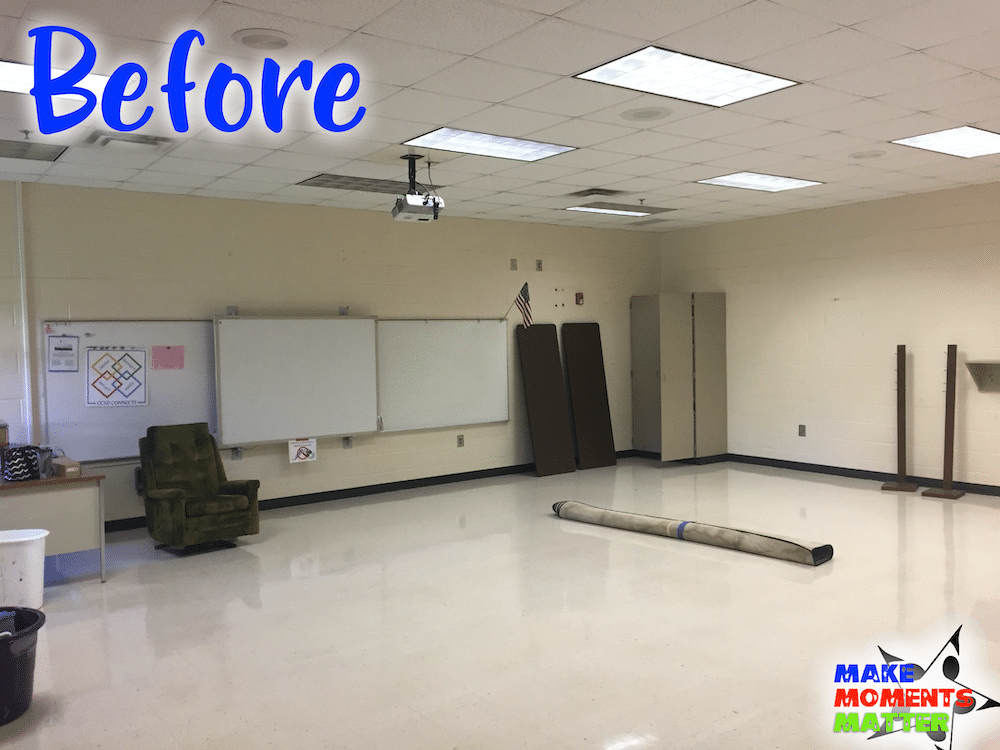
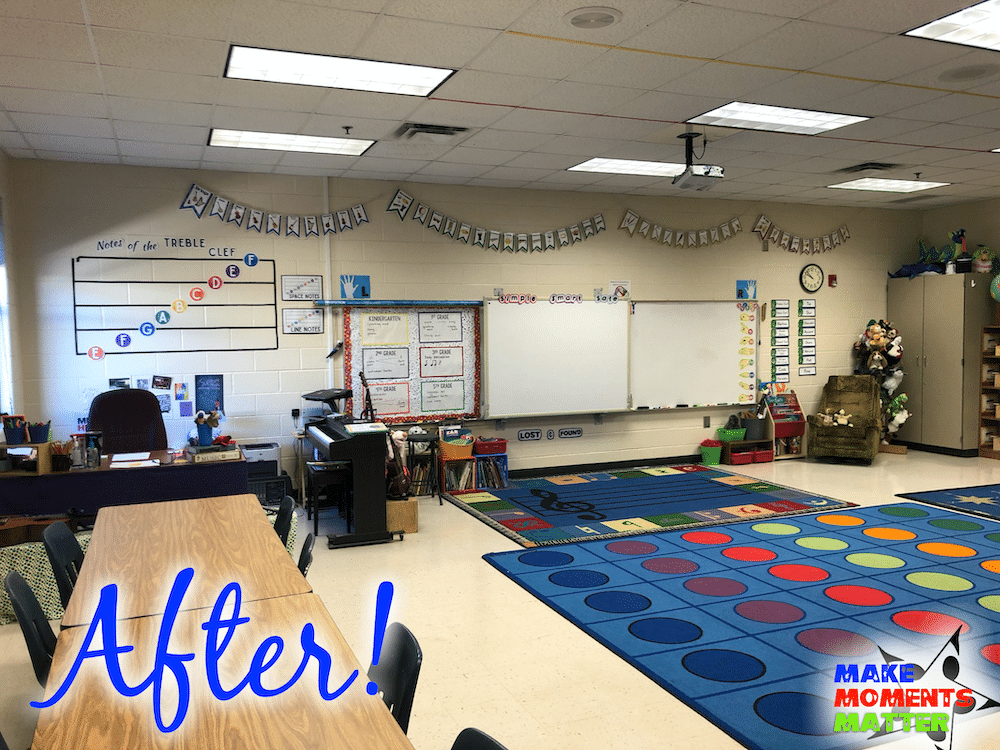
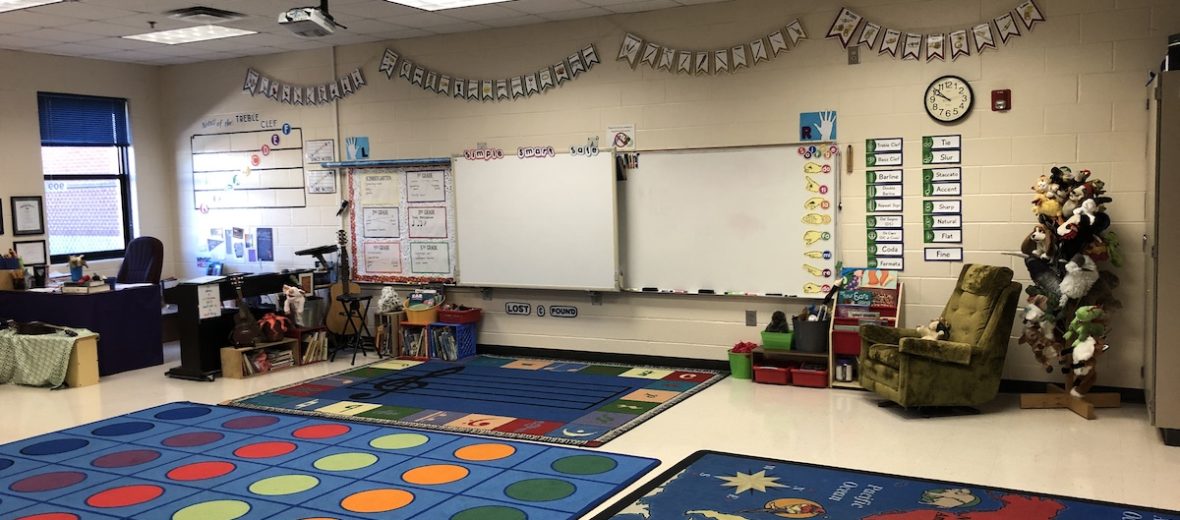
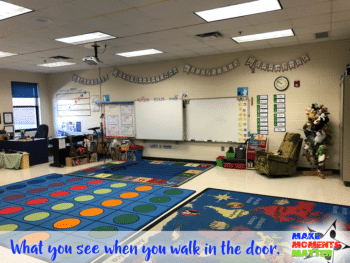
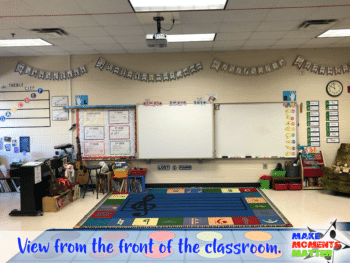
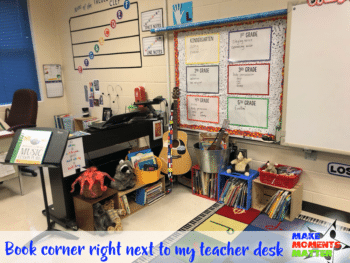
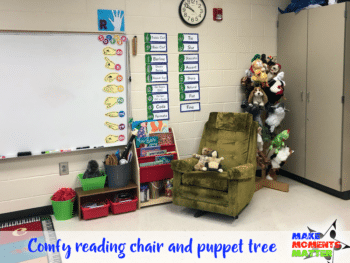
Here’s a view of the “front” of the music room including the main white board, the Promethean board, and front carpet area. On the right: I’ve got room for writing on the white board, a comfy chair for reading to kiddos (it belonged to my Great Grandma), my puppet tree, and a mini storage closet. On the left: I have a little “book nook” with children’s book storage, a vocabulary anchor (see next paragraph), my digital piano, my teacher desk, and above those on the wall an anchor wall for notes of the Treble Clef. Up above the board you’ll find my instrument flags/bunting where I display a variety of common instruments separated into their different families.
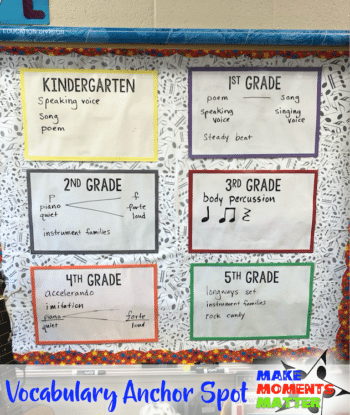
Vocabulary Anchor Spot – I know that many other folks have a room with a white board that’s sort of cut up or interrupted by an interactive whiteboard or TV right in the middle. Instead of leaving the whiteboard elements on both sides I decided to cover up the whiteboard on the left with music note themed paper to make a vocabulary anchor spot. I used large laminated pieces of paper to add a mini-vocabulary anchor spot for each grade – laminated because I can write on/wipe off easily with dry erase marker.
I have a large Word Wall (you’ll see that a little later in the room) but I wanted to have a special spot for “high frequency words.” My thought is that the general word wall can be used by all grades K-5 but that I wanted one place to put all the words that are special for each grade. Kids know that if I introduce a new word or highlight a word from the word wall that I’ll put it in their special vocabulary box to the left of the Promethean board. This way they’ll be able to find words a little easier instead of having to search the entire word wall/room to find the word they’re looking for.
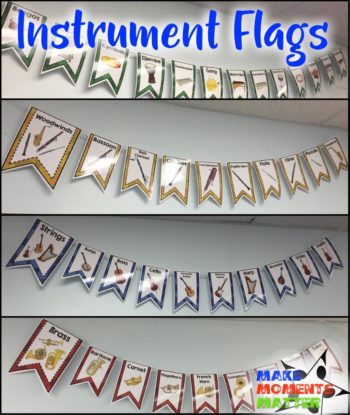
Instrument Flags for Bunting – Instrument flags like these have been a staple of my classroom for the last few years. I always struggled with how to display different instruments of the orchestra in an authentic and exciting way without taking up too much space. Some posters out there are just too big or too small and/or don’t have the instruments labeled in an effective way.
The nice thing about using these flags is that you can string them up on some yarn or rope and hang them up near the ceiling of your classroom (often an unused space). They’re fun and colorful and look like a decoration but also serve an important purpose for instruction. More than once I’ve seen kids looking up at the flags and remarking to their friends about their favorite instrument, talking about “what I’m going to play when I get to middle school.” You can print the flags in black and white and they come in several different sizes making this a resource that I hope you can use in multiple ways. Check out the instrument flags at this link.
Right Side of the Room
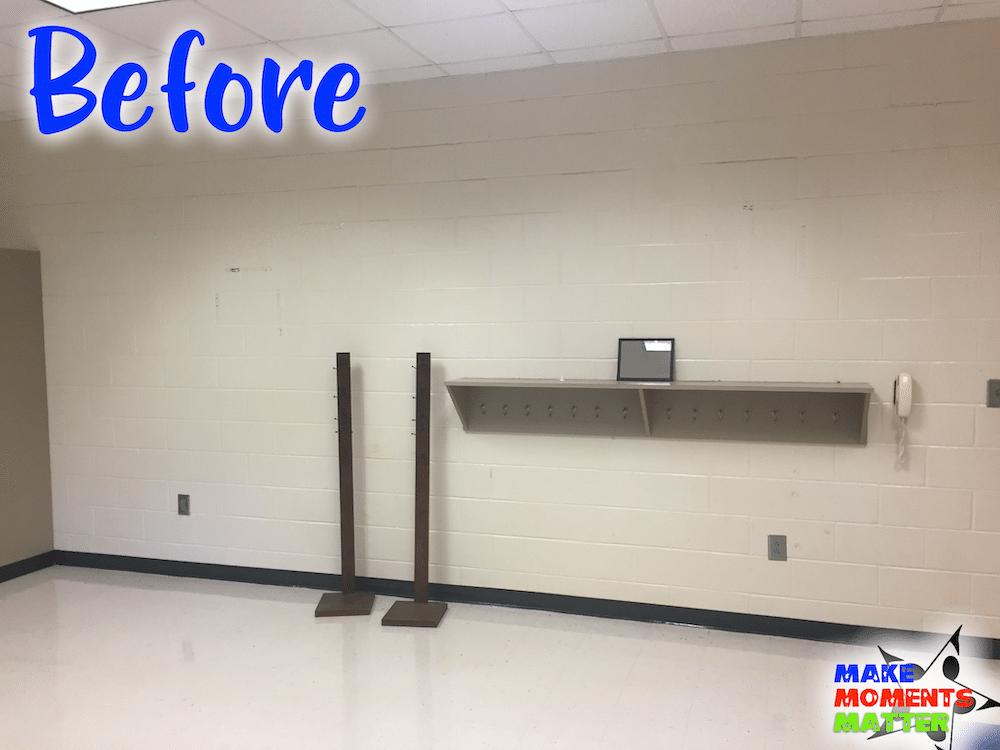
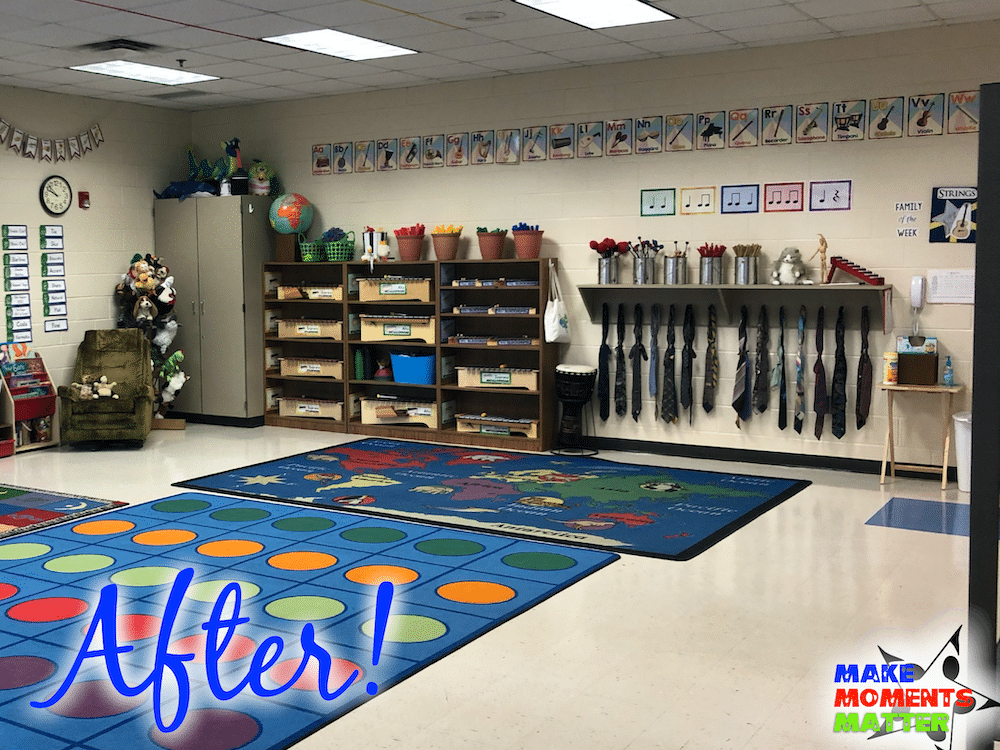
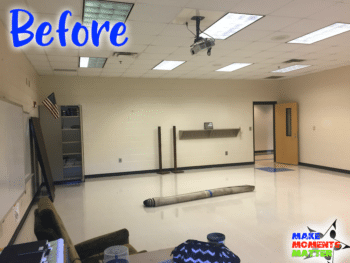
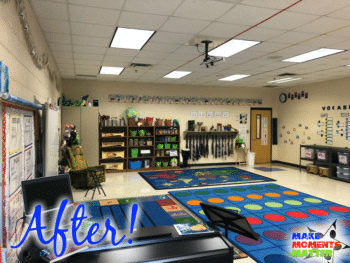
The right side of the room (directly to your right when you walk in the door) had a few things when I walked in. A big built-in storage closet, some empty space, and a long rack with coat hooks. I made some choices about what I wanted to do to transform this space. First of all, I found a carpet with the world mapped out (which was going to be surplused/tossed) and I brought it in to warm up the space and use when we talk about songs from around the world. I also added an Instrument Alphabet on the wall above everything else. One instrument for each letter and a great way to expose kids to instruments from around the world while also tying your classroom in with the whole building (because nearly every other teacher in the building has an alphabet of some sort on their wall!).
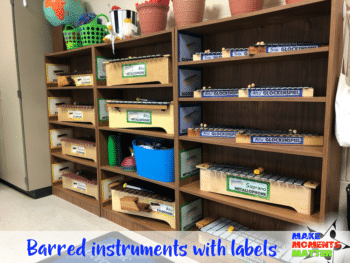
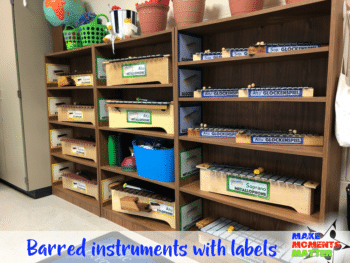
Barred percussion Instrument storage – When walking around the school at the beginning of the year I found some old shelves which were going to be thrown out. Homeroom teachers had found new ways to store their books and didn’t want the old and cheap shelving. Those shelves were easy to repurpose and use for instrument storage as each shelf was basically the perfect size for a xylophone, metallophone, or glockenspiel. The nice thing about these cheap shelves is that you can move the shelves up and down as needed (depending on the size of your instruments) and you also have storage on top of the shelves for other instruments, mallets, whatever you need.
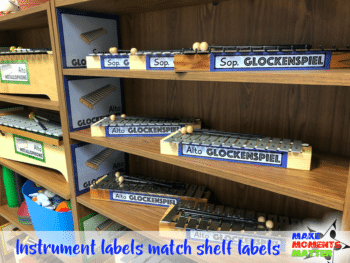
One thing that I did to help classroom management and instrument storage was to create and use instrument labels that matched labels on each shelf. That way, kids could quickly identify each instrument and also knew which shelf to put it back on. This makes taking out and putting away instruments pretty quick and simple. If you like the labels I use for instrument you can find a variety of colors/styles in my TPT store.
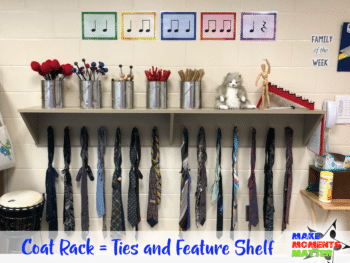
Coat Hooks –Right inside the front door there’s a place with lots of hooks where kids can hang up coats or backpacks (if this were a regular education classroom). I decided to reuse this space for a different purpose. The shelf above the hooks is a place for me to place instruments we’re highlighting that week, keep mallets, feature books we’re using in class, or just use for storage.
Instead of using the hooks for hanging coats I use it to hang pre-tied neckties. Lots of folks see pictures of these ties and ask what they heck they’re used for. I use the ties to help with folk dance, partners, and classroom management. Neckties make choosing a partner much simpler since it takes the guess work out of “who can be my partner,” cutting down on transition time. Give half the class ties and tell them to find a partner who doesn’t have a tie. The ties also make it so simple to see if kids are rotating correctly or standing in the correct spot for a dance. Click here to read a whole blog post about using ties in the classroom.
Left Side of the Room

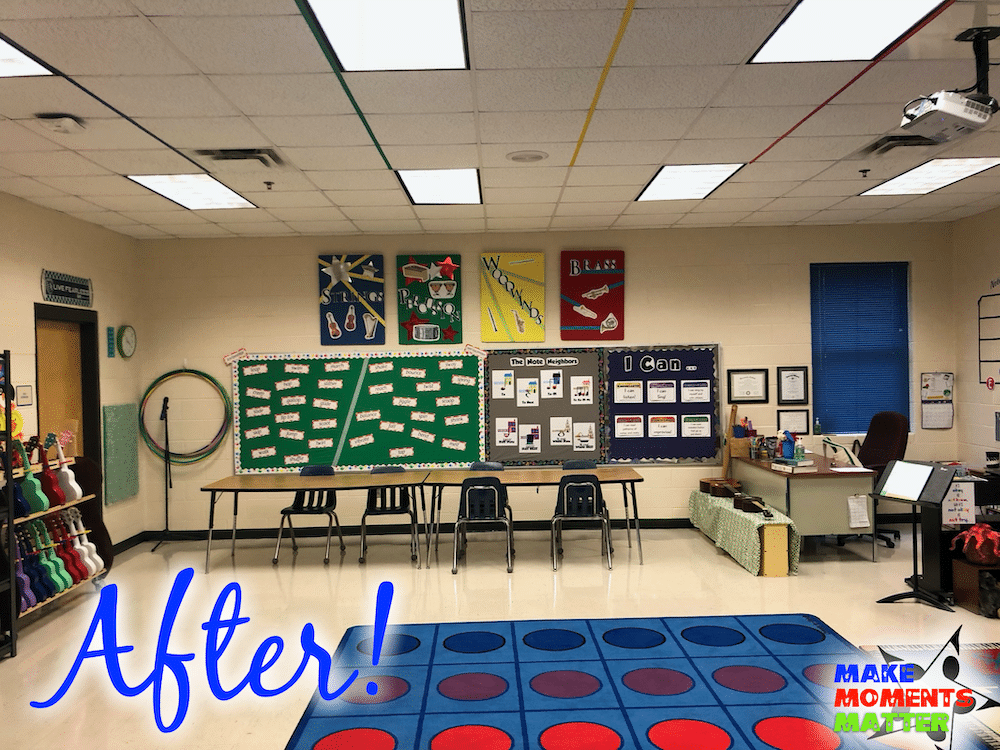
The left side of the room (really the first thing you see when you walk in the door) has a huge blank wall with a full bulletin board. This is really a great space to display content and put up anchor charts to use throughout the year. The two tables and chairs were a “you can’t change that” decision by my administration since there are frequently Specials team meetings and lunches in the music room. If I had a choice, I would have taken them out to make more space for movement, playing instruments, etc. They also sort of block the bulletin boards… but again, not something I could change.
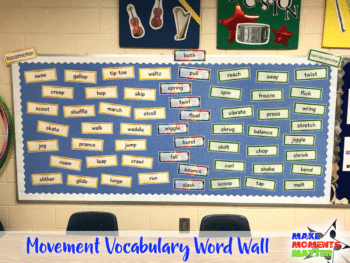
Movement Word Wall – One bulletin board I always try and include in my classroom is a space dedicated to movement words. The cards you see on the wall could honestly be used as flash cards or reference cards but I decided to post them on one of my big open bulletin boards. The words are separated into locomotor and non-locomotor categories with a group in the middle that could potentially be both depending on how you move. Organizing like this lets kids identify and categorize the words. It’s been fun to have kids reference these words when they’re allowed to improvise a dance or when they need inspiration. It’s also handy when we talk about which actions are best to use in a certain situation and, honestly, it’s helped me come up with more movement options on the fly! If you’re interested in a movement word wall check them out in my TPT store.
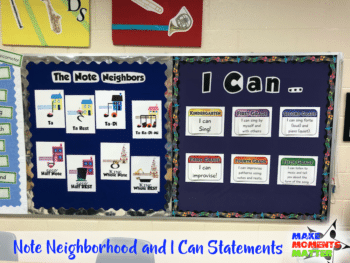
Note Neighborhood – The Note Neighborhood is a set of stories that I came up with to help students remember note values and how notes and rests interact with one another. In my first few years of teaching I realized that students remembered things a lot better if there was some sort of story or narrative behind them. Instead of just saying “A half note gets two beats” I can tell students the story about the “Sassy Half Note” and how she interacts with the other “Note Neighbors” in her little town. The stories stick and are fun for kids to remember. I made a whole set of PowerPoint presentations that I use with kids whenever I introduce the notes but I also printed out this set of posters to use as a sort of anchor chart. Click here if you’d like to learn more about the Note Neighborhood.
I Can Statements – Every school I’ve ever worked at has required me to post “I can” statements in my classroom. The I Can Posters are intended to help each student understand the point of every lesson and know what skills they should be able to do at the completion of that lesson/unit. I wrote a blog post about many different ways to display I Can Statements in your classroom and how to use them effectively if you want to learn more. The statements I posted here follow the newest National Standards for Music Education and are super easy to switch out. There are anchor spots for each grade level I teach and I have preprinted a variety of statements. Each printed “I CAN” has velcro on the back. I take the “I CAN” statement I want for that lesson and stick it to the grade level it goes with. Super easy to change out as needed. You can get the I Can Bulletin Board set in the picture above at this link.
Back of the Room
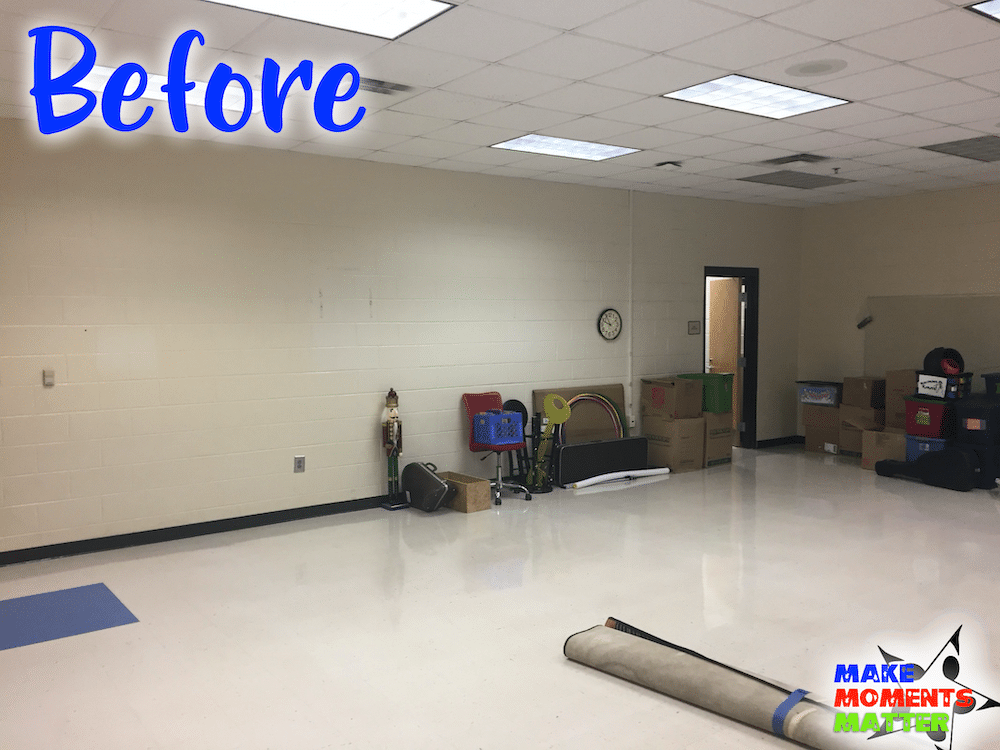
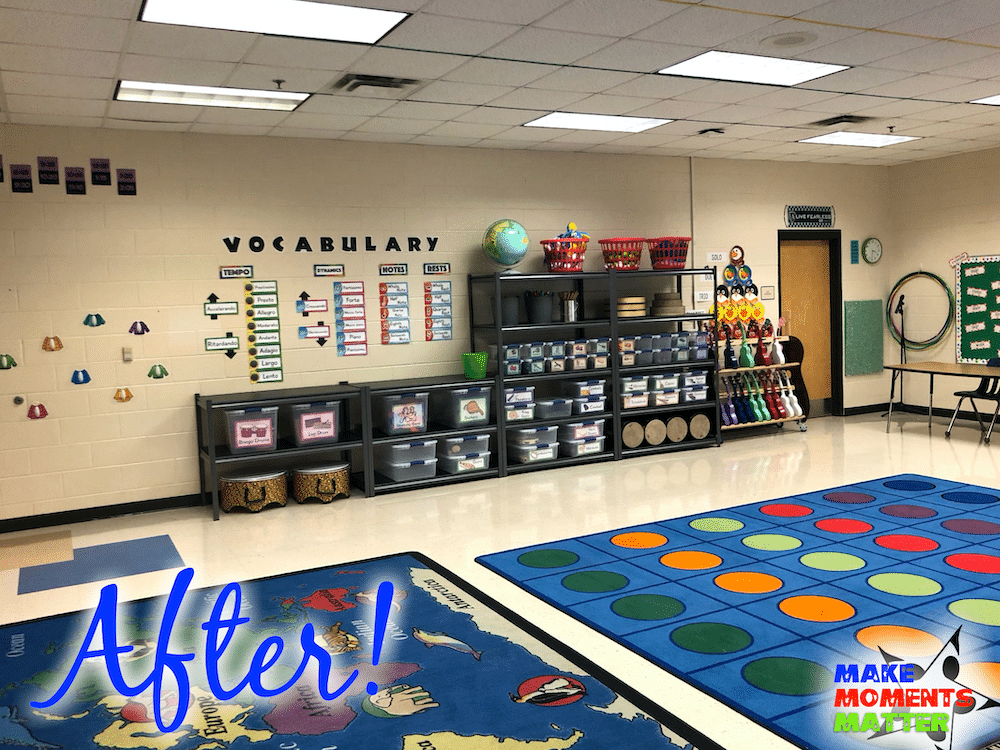
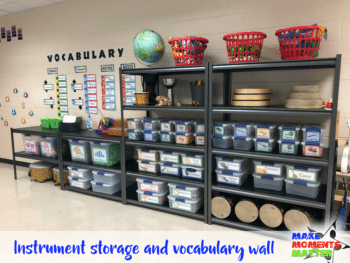
The back of the room (directly to your left when you walk in the door) has a huge blank wall and was the biggest transformation of all the spaces in my classroom. This wall is the home for my main vocabulary word wall which you can see on the left and lots of instrument storage. In my first year teaching at WES I was fortunate enough to get a grant for a class set of ukuleles and a ukulele cart for storage (you’ll see that cart near the closet door). I also was able to purchase 3 large shelving units and a variety of heavy duty boxes so that I could sort, label, and store all my nonpitched percussion instruments.
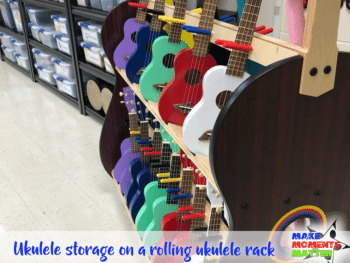
Ukulele – My county has an education foundation which offers grants to teachers and I was lucky enough to be selected to receive a grant for a class set of ukuleles. I purchased 30 Makala Brand “Sharks” and “Dolphins” from West Music and also purchased this rolling cart to go with them. I would also highly recommend this brand of ukulele and would suggest you call West Music to get a quote on which ukuleles to buy, how many, what extras you will want, and more. They really helped me get just the right set of instruments for my students.
I love the mobile cart because I can easily stores the ukuleles and roll them anywhere in the building in case I have to have class in a homeroom or if we want to have a performance in the gym. I also just didn’t have the space on any of my walls where I could hang the ukuleles (I know lots of other teachers do that).
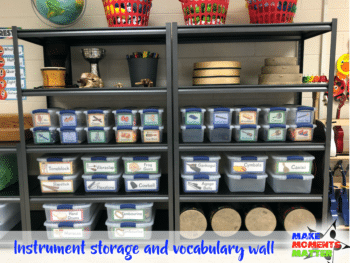
Nonpitched Percussion Instrument Storage – One thing that I knew I needed in this room was more storage for instruments. When I got to WES the instruments were in the storage closet and out of view. I wanted them in the room so that students saw them every day and we could grab and use them easily. My building bought three large storage racks from Sam’s Club. The great thing about these shelves was that they were sturdy and easy to configure. I could move shelves if I needed and I could stack them 5 shelves high or turn one tall shelf into two smaller shelves (as you see in the picture). Then I bought some heavy-duty plastic boxes in a variety of sizes to put the instruments in.
If you’re going to do something like this I would suggest you buy a variety of box sizes so that you can store bigger instruments, smaller instruments that you have a bunch of, odd sizes, etc. I’d also suggest that you buy something where the lid locks in or latches on. I worked in another place where we didn’t have lids and I was constantly dusting off instruments and shaking out bins. Lids are important but lids that don’t latch are a mess waiting to happen. Totally worth the extra money for locking lids!
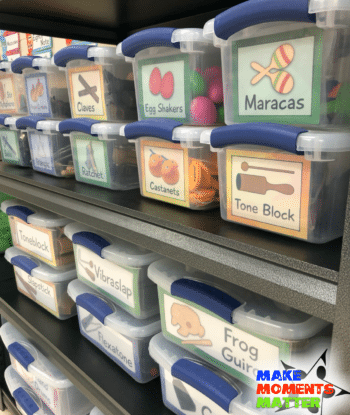
I printed off instrument labels and taped them on the inside of the clear boxes so that we could see what was what without opening the box. I also color-coded the labels so that all woods were the same color, all metals the same, all scrapers/shakers the same, and all membranes the same. This makes it a bit easier for kids to categorize and identify instruments. The instrument labels you see here come in the same set as the pitched percussion labels in my TPT store so that you buy once and get a coordinated set for pitched and nonpitched percussion. The specific bins I bought are Sterlite brand. My school purchased them from Walmart because of the way our district buys things but I’m sure you could find them in places like Home Depot, Amazon, or Target.
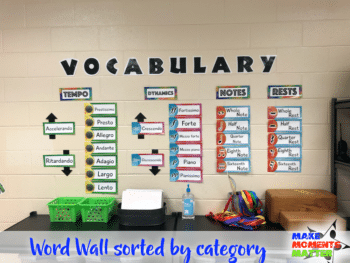
Vocabulary Wall – I call my “Word Wall” the vocabulary wall and we use it all the time. I don’t really think that there’s a right or wrong way to set up a word wall because we all use them in different ways. I choose to separate words by their categories when I post them up on the wall so that all dynamics are together, all tempo words are together, etc. Many teachers just put all the words they’ll ever use up on the wall in alphabetical order, but I think that categorizing helps students see connections between words and find the correct vocabulary word a little quicker.
Front Door – Hallway
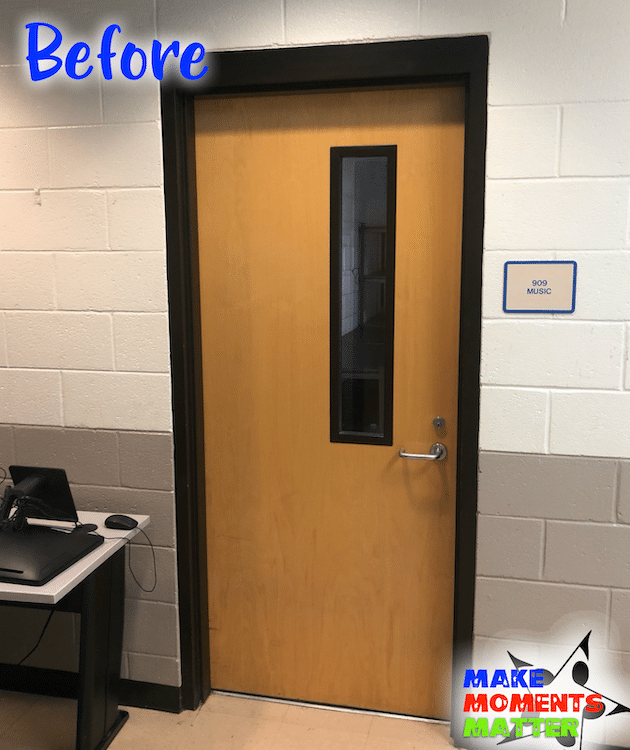
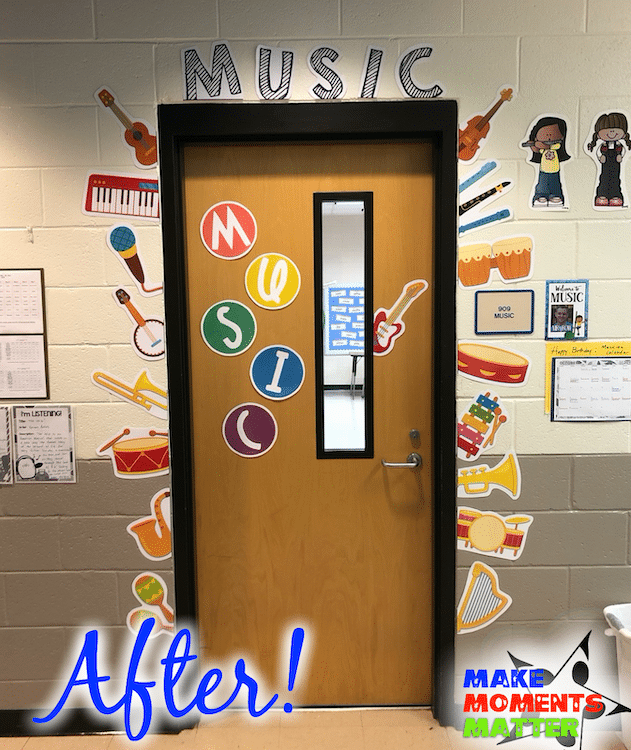
I love decorating my classroom door and in the past I’ve done streamers, twinkle lights, and other more ostentatious displays. In this building my room is in a main hallway that connects the K-2 wing, 3-5 wing, and office to the gym, cafeteria, and bus loop. Needless to say, this hallway gets a lot of traffic all day long. I couldn’t put anything too big out in the hallway but I still wanted to draw my students’ eyes and get them excited.
So I made this new decor set where it looks like the music room is exploding with instruments, sounds, musical students, and excitement! I used this kit to spruce up the door to my classroom, but I also thought that it could be used for the edges of a bulletin board or any other decorative space!
A Few More Spaces and Views
I’m including a gallery of a few more views of my classroom below. It was hard to get photos of everything to really give a clear view of the space. Click through to see more views of my room.
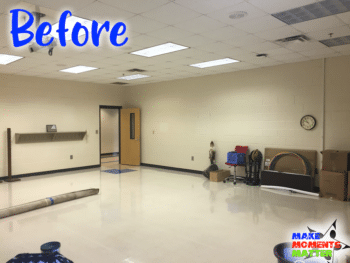
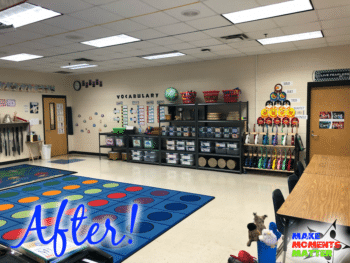
Well, I hope you enjoyed this little tour of my new classroom. I definitely have more to do and places where I can improve. I love thinking about how I can alter the space and make it more functional for students while also making it a better place to learn. If you have ideas for me or if something you saw in this post sparked your interest, please leave a comment below! I’d love to hear from you and appreciate your comments!


6 Comments