Station Signs for Music Learning Centers
 One of the most difficult things about learning centers is the organization, rotation, and logistics. Center rotations can fall apart when students don’t know where to go or what to do at each station. If a student needs to move from one station to another I do my best to make it absolutely clear where they go. I don’t want to spend my time talking through transitions. I want all of my mental energy going towards teaching, assessing, and working with students.
In this post I wanted to share a few tips and tricks about how I get student to rotate from one place to the next using printed signs for each station. I’ve found that using the printed reminders really helps kids as they attempt to work independently. Once you teach students the process you can place signs in strategic places to help them make transitions from one place to the next. You’ll get my ideas on how to make the signs, what to include, and even a few ideas on how to display the signs in effective ways!
Teaching Kids How to Rotate – Maps and Signs
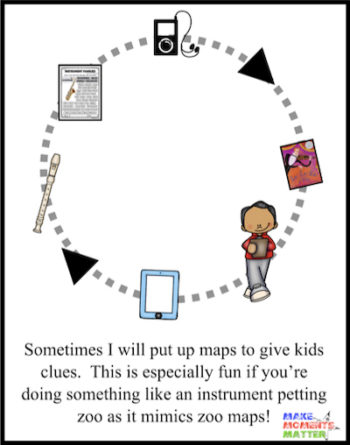 When placing centers throughout my space and thinking about how the kids will rotate I always try and follow a predictable pattern. I generally locate center activities around the edge of my room so that students can rotate around the perimeter either to the right or the left. This helps eliminate confusion as to where they go next if they always progress in the same direction. Putting kids on the edge of the room also cuts down on the overall sound. If there are students playing recorder, ukulele, or Orff instruments you might have them face towards the wall so that any sound points that way and doesn’t shoot straight into the room.
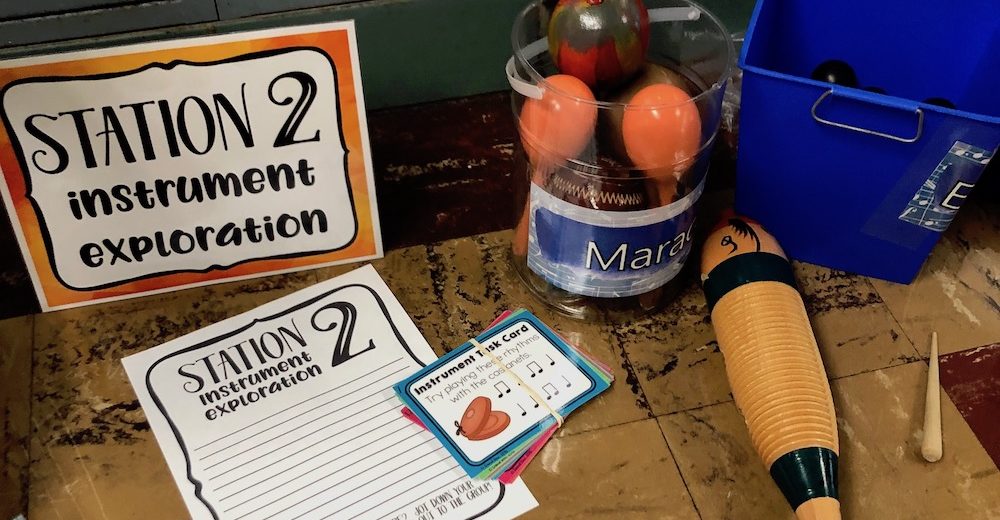
I’ve found that when I put signs with numbers (i.e. #1, #2, #3) that students are more easily able to transition to where you want them to go next. Kids can easily follow the pattern from Station 3 to Station 4 without any explanation from you. You can also place center signs with clear labels like “tech center,” “instrument exploration station,” or “reading the staff station” to help students find where they need to be. If you want, along with station signs you can give students a check list of the places they need to go to and let them see the order for themselves and cross off their progress.
I made a free set of station signs to use in the music classroom. These station signs are meant to be printed out and placed with learning centers so that students can quickly find where they need to be during center rotations. There are signs with numbers (i.e. Station 1, Station 2, Station 3) and also a set of signs with the center theme (i.e. Tech Station, Recorder Station, Assessment Station). If you can think of other centers that could/should be included in the set shoot me an email and I’ll be happy to add them to the set as time allows!
Displaying the Signs for Students
Any time I make decor items for my classroom I print them on card stock and then either laminate the items or place them in a protective sheet or cover so that they don’t get harmed. Basically, if I’m going to the trouble of printing something I want to be able to use it over and over again. While I do love laminating posters, I also often put items that need to be preserved in dry erase pockets. These pockets can be written on and then wiped off as needed and are a sturdy alternative to plastic sheet protectors.
How you display the signs depends on your room setup and your preferences. You could tape the signs to the wall or hang them in some way. The downside is that might just add a sticky residue in places that you don’t want it and mess with what you’ve already got going on with your walls. Instead, I like to print out station signs and prop them up on the floor next to the actual station materials. That way kids see the signs and immediately see the activity that goes with it. Below I have three different pictures of how I have put up signs in the past (click to enlarge the photos).
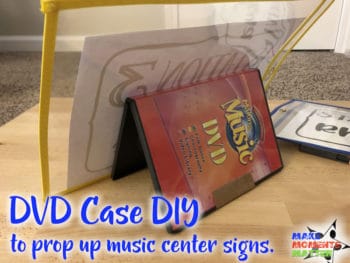 The first thing I tried was putting my station signs in the dry erase pockets and then trying to prop them up. I took some blue painters tape and stuck the signs to old DVD cases which I used to prop up the sign as a little stand. While this did work well and felt like a DIY win, they didn’t feel sustainable and ultimately I decided to try something different.
One of the positive things about this system was that I could replace the actual station sign pretty easily by opening the dry erase pocket and changing what’s inside. That way if you wanted a recorder station for one class and a reading station for the next group you could use the same pocket and just change out what you put in it. The downside to this system was that the DVD cases were pretty bulky when you tried to stack all the signs and put them away. It felt clunky and didn’t work as well as I wanted it to.
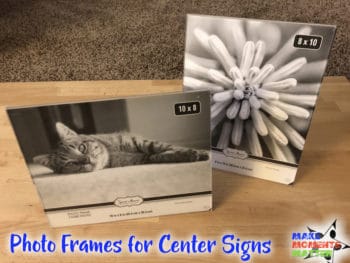 I found these fun plastic photo frames at the Dollar Tree and realized they would work pretty well for centers signage. The signs are only $1 and are pretty sturdy. I think that they would hold up pretty well but with kid hands, you can never tell. The other great thing about these frames is that they also allow for easy switches, meaning you can take out and change whatever sign you decide to put inside.
The only downside to these is that they are 8″ by 10″ meaning any sign you print out will need to be cut down to really fit in the frame correctly. That might be a hassle to try and fit everything in the frame and add one more step to sign creation. The frames also make it so easy to change out the picture that I imagine students would be able to easily slip out whatever poster you put in the frame.
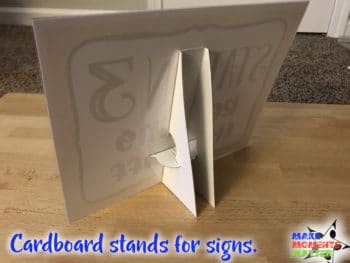 The final solution I came up with was inspired by my many years working for a retail company in the mall. We would often get promotional material from the corporate office with pictures of people wearing the product, sale signs, and the like. On the back of each cardboard display piece was a little stand that would fold out and keep the poster standing.
I looked online and found little stands just like the ones I remembered from working retail. These small cardboard pieces lay flat but can easily fold out to become a poster stand. I printed off the posters I wanted, laminated them, and then stuck the cardboard stands to the back. When I’m ready to put them away the posters lay flat but when they need to come out they pop out and stand like a picture frame.
Small group learning centers can be a fun way to teach, reteach, and reinforce concepts and the whole process runs more smoothly when students know how to get from one place to another. I’ve found that using printed reminders like signs and maps really help kids rotate smoothly through different centers. Use the free posters I created or come up with your own centers signs and see what works and what might be improved.
Implementing learning centers is really a process of trial and error to see what works well with kids and what makes the process easier. That’s why I encourage you to leave any tips and tricks that you use for center rotation in the comments section below so that we can all learn together.


2 Comments